Effective collaboration and seamless document management are essential for organizations of all sizes. As organizations strive to enhance collaboration, productivity, and data accessibility, moving documents to SharePoint has become vital.
However, the migration process can be complex and daunting without proper guidance.
In this article, I’ll explain how to prepare your SharePoint environment for migration and provide instructions to move data to SharePoint Online successfully.
Let’s begin!
To migrate files from on-premises SharePointOnline, access the Admin section on Office 365, choose SharePoint, and go to the Migration tab. Install the SharePoint Migration Tool, open it, and start a new migration. Select the File share option, and choose the folder to migrate.
For more details, Follow the instructions below to migrate file shares using the migration tool in SharePoint:
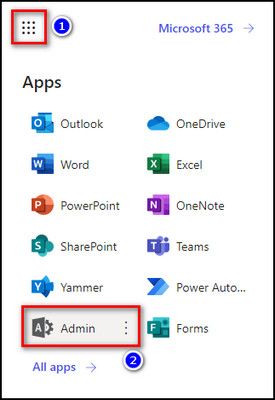
- Go to Microsoft 365 and sign in with your organizational admin account.
- Click on the App launcher from the top left corner and choose Admin.
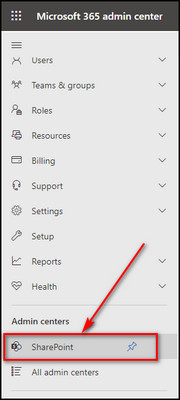
- Select Show all from the left sidebar and choose SharePoint under Admin centers.
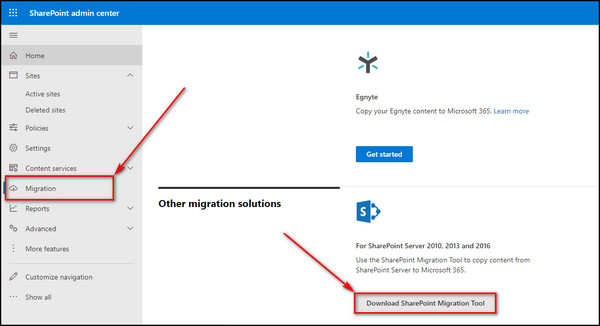
- Proceed to the Migration tab from the left menu.
- Scroll down and click Download SharePoint Migration Tool.
- Install the Migration Tool and launch the app.
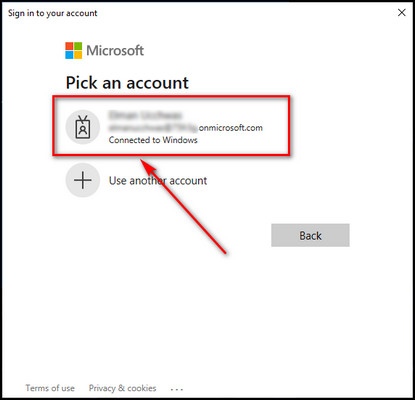
- Login to your Microsoft administration account when prompted.
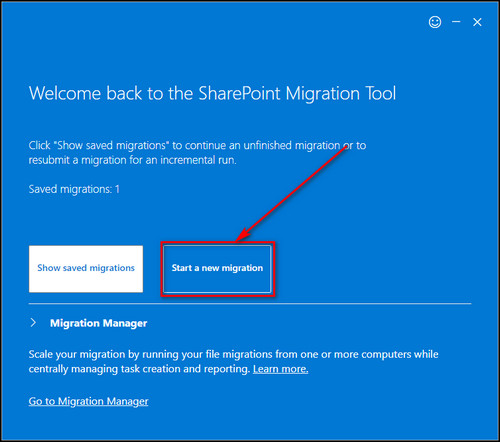
- Click the Start a new migration button.
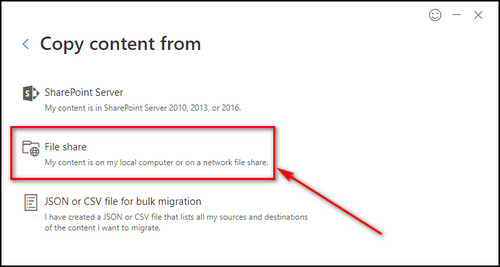
- Choose File share to move files from your local computer.
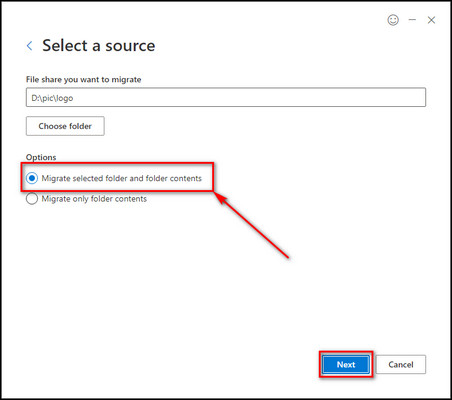
- Click on Choose folder, select the folder you want to migrate, and click OK.
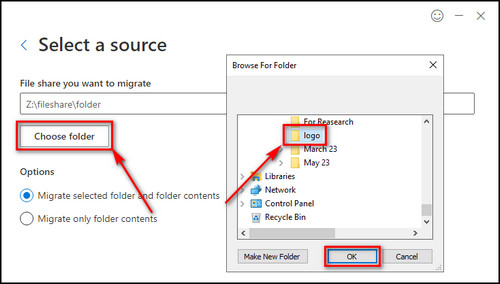
- Choose Migrate selected folder and folder contents to share the files within the folders and click Next.
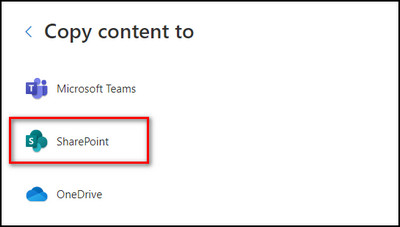
- Select SharePoint.
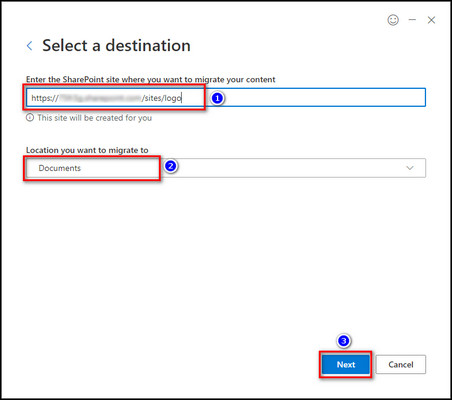
- Provide the SharePoint site & the location where you want to migrate your content and click Next.
- Enter your Migration name and click on Next.
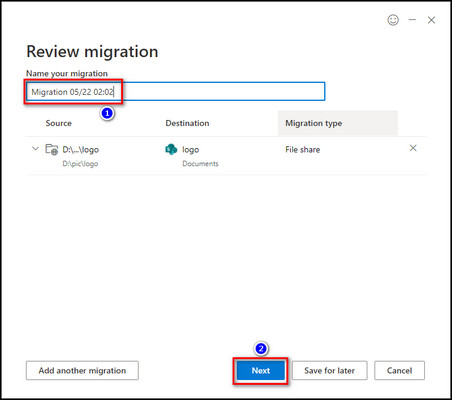
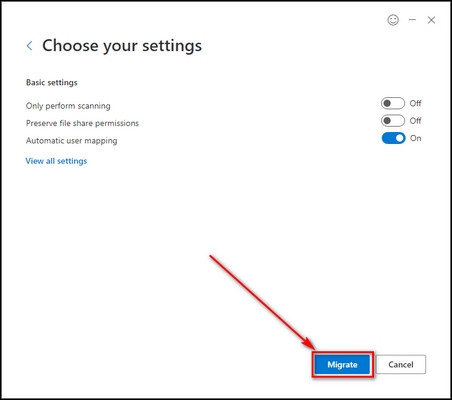
- Go through the migration settings and change them according to your preference. Once everything looks good, click the Migrate button.
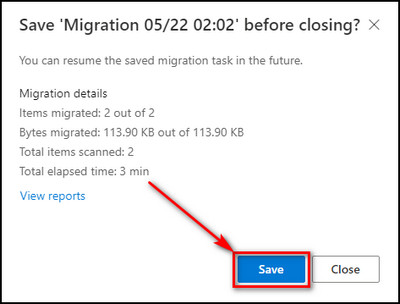
- Select Save to store the migration to reuse it later.
After saving the migration, you can use the Run incremental option anytime you upload a new file in the migrated folder on your local device. It will migrate only new files to your selected SharePoint site. 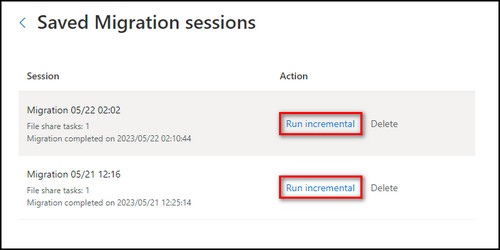
Before starting your SharePoint migration, it is crucial to take inventory of your existing data and inspect it thoroughly to understand the contents of your current environment. Then cleaning up your environment by removing any unnecessary or outdated data is essential.
Additionally, prepare your users for the transition by providing the necessary training and information.
Once everything is in place, initiate the migration process and carefully move your data to the new environment.
Below I’ve provided the steps you need to follow before you start the SharePoint migration process:
1. Inspect Your Source & Plan Accordingly
Perform a thorough scan of your data source and take the time to analyze it accordingly. Understanding your current environment is crucial for effective migration planning, whether it’s file servers, unofficial storage services, or cloud storage apps.
Gain insights into the location of your data, its usage, relevance, and sensitivity. Additionally, consider factors such as file names and path lengths to ensure proper preparation for migrating to your new SharePoint environment.
By comprehending how your users have interacted with the content in your source, you can strategically plan data construction and productivity that will enhance the user experience.
Once you have completed the discovery process, prioritize your migration objectives.
During the planning phase, select the best migration approach and the right tool for the job. Utilizing a comprehensive tool that aligns with your migration requirements will significantly contribute to your overall success.
2. Ensure Proper Content Packaging
When migrating to SharePoint Online, it is crucial to plan the packaging of your content effectively.
Migrating large pieces of data simultaneously can lead to performance issues and throttling throughout the transfer process. On the other hand, migrating packages with small amounts will slow down the overall migration progress.
Determining the appropriate content size you want to move and prioritizing the migration of specific file types will play a significant role in your migration strategy.
Microsoft suggests packaging 250 files every time you transfer to enhance throughput. It is recommended to have a package size of at least 100 MB but no more than 250 MB.
It is important to note that migrating larger files tends to be faster than migrating smaller ones. Additionally, files generally migrate more quickly than list items and objects.
Before initiating the migration process, it is essential to check that your target in SharePoint is prepared.
By classifying your content and utilizing the management instruments available in Microsoft 365, you can effectively control your data, ensure proper information protection, and proactively manage potential threats from the very beginning.
Planning and implementing your management plan in advance is crucial to leverage the control features offered by SharePoint Online fully.
By doing so, you can maximize the benefits and functionalities provided by SharePoint and ensure a smooth and well-managed migration experience.
4. Change Management for a Successful Migration
To effectively prepare your destination, it is essential to prioritize change management. Allocating time and resources to this aspect will increase the adoption rate and enhance your business processes.
While it is essential to consider your current workflows throughout the detection and organization stages, embracing the changes and alterations that come with migration is equally important. Strive for a balance between established systems and embracing improvements.
Fortunately, SharePoint Online offers a range of tools to support this effort. Additionally, its integration with different Microsoft 365 programs opens up numerous possibilities for productivity enhancements.
Make sure to explore and research these possibilities to maximize the benefits of your migration.
5. Conduct Experiments for a Smooth Migration Experience
It is crucial to account for unexpected factors that may impact the final outcome no matter how well you’ve constructed your plan.
Performing pilot tests allows you to identify and address any gaps or issues in your plan before proceeding with the actual migration. It is essential to find datasets that closely resemble your intended migration scope, as this will enable you to evaluate the effectiveness of your plan and make any necessary adjustments.
6. Plan Your Migration Timeline and Process Strategically
I’d recommend scheduling the process during off-peak hours to ensure optimal efficiency during your Microsoft SharePoint Online, such as on weekends or at night, in your local timezone. This approach minimizes throttling and maximizes throughput.
Furthermore, it is essential to simultaneously adhere to Microsoft’s recommendation of not exceeding 5000 migration requests.
Overloading the migration queue can significantly slow down the process. Additionally, completing ongoing migration tasks before initiating new requests is vital to maintain a smooth and uninterrupted migration experience.
To ensure a smooth transition when migrating file shares to SharePoint, firstly, conduct a comprehensive document inventory to identify all files/documents that need to be migrated. Next, systematically organize and categorize these files/documents to simplify the migration process.
These processes can effectively clean up the mess and facilitate a seamless transition to SharePoint.
Here’s how to clean up the mess before moving file shares to SharePoint:
Perform Document Inventory
Conducting a thorough document inventory by reviewing your sub-folders and folders is important. Evaluate which documents will be retained and which can be left behind, such as outdated files or duplicates already stored elsewhere.
SharePoint, a Microsoft tool, stands out for keeping and controlling Microsoft Office files (Excel, PowerPoint, Word, etc.) and PDFs.
Moreover, the recent enhancements to the Picture Web Part enable efficient storage of images and videos.
However, certain file types are not suitable for SharePoint. Consider keeping files like software code, program/application files, executables, and extra-large files on file shares or using particular file storage applications for these specific file types.
Organize and Categorize Your Files/Documents
After determining which documents will be migrated to SharePoint, it is essential to categorize them effectively. Although they might currently be mixed in a shared drive or folder, this will not be the case when moved to SharePoint.
Your repository likely contains various documents with different purposes, such as project files, policies and procedures, customer documents, and department files.
It is crucial to identify your various categories of documents since they belong to separate sites within SharePoint.
There are two key reasons why it is necessary to upload various types of documents to different sites in SharePoint: function and security. For example, your policies and procedures documents may require different security settings than your customer or project files.
You should create separate sites based on their security level or operation. Avoid replicating the current disorganized state of your file share and strive for a more structured approach within SharePoint.
FAQs
How do I move a shared file to SharePoint?
To move a shared file to SharePoint, right-click on the synchronized documents folder and choose the option to open it in a separate window. This will allow you to view it alongside the company files you intend to transfer. Select all the desired files you wish to move, and then simply drag them over to your synchronized SharePoint folder. The blue circular arrows next to the files indicate that the syncing process to the SharePoint site is in progress.
What is the migration tool for file sharing to SharePoint?
The SharePoint Migration Tool (SPMT) is a no-cost and user-friendly migration solution designed to assist you in seamlessly transferring content from your on-premises SharePoint sites to Microsoft 365. By migrating your SharePoint Server sites and content, you can utilize the advanced security, intelligence, and collaboration features offered by Microsoft 365.
How do I move files from OneDrive to SharePoint online?
To transfer files and folders between OneDrive and SharePoint, open OneDrive and select the desired files or folders. Choose the Move to option. Specify the SharePoint site you want to move the selected items. Finally, select the destination where you wish to relocate the items and click Move here.
Final Thoughts
Migrating file shares to SharePoint, Microsoft’s powerful cloud-based platform, presents a remarkable opportunity to centralize and enhance file management, accessibility, and teamwork.
In this article, I’ve provided the precautionary and essential steps to execute the migration process in SharePoint successfully.
Comment below if you have further questions, and we’ll get back to you.