Have you ever found it challenging to fit an image or chart in a Word document?
The default portrait orientation is good for text. But for an image or wide chart, landscape orientation suits the better. However, it’s not ideal to change the whole document’s orientation for an image, table, or chart.
In this article, I’ll show how you can make only one page landscape in Word and keep the rest of the document as they were.
So, let’s begin.
How to Change Orientation of One Page to Landscape in Word
You can make a single page landscape in Microsoft Word by selecting the text and changing the orientation from portrait to landscape from Page Setup. Also, users can make one page landscape by inserting page breaks and applying landscape orientation on the preferred page.
If you’ve tried changing the orientation of a Word document, you’ll notice all the pages in the document changes at once. It happens because the orientation setting applies to the whole document, not a single page.
There are two different methods to make just one page landscape in Word. The procedures are the same for all versions of MS Word. Consider reading the following passage and changing the orientation from portrait to landscape.
Here are the ways to change the orientation of one page to landscape in Microsoft Word:
1. Use Page Setup
The Word document orientation is set to portrait by default. If you want to change part of a document to landscape quickly, you can use the Page Setup option.
Here are the steps to change the page orientation to landscape in Word using Page Setup:
- Open Microsoft Word.
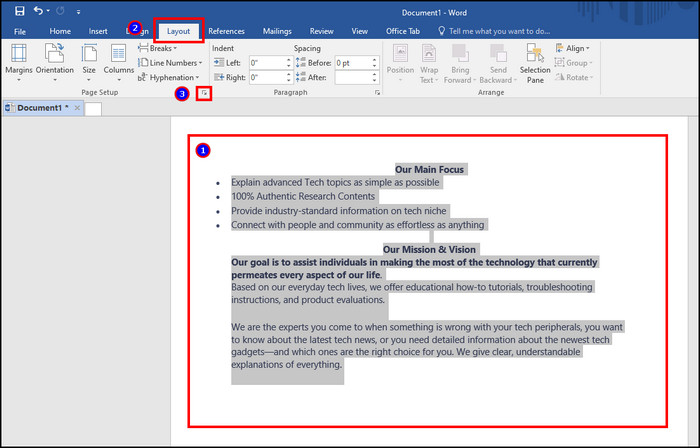
- Select the content like text, images, table, chart, etc. you want to change to landscape.
- Go to the Layout tab from the top.
- Open the Page Setup dialog box.
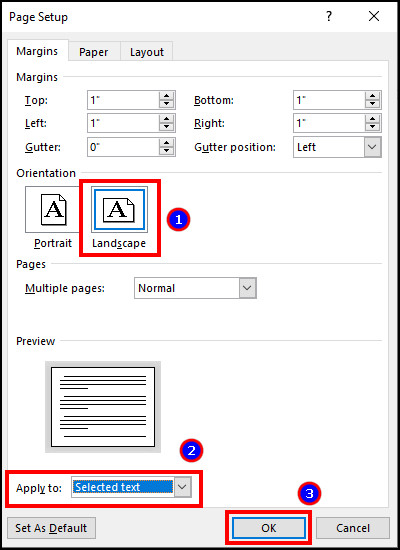
- Click on Landscape from Orientation.
- Choose Selected text from Apply to.
- Press on OK.
The selected text and page will change from portrait to landscape, and the rest of the document will remain in portrait orientation. 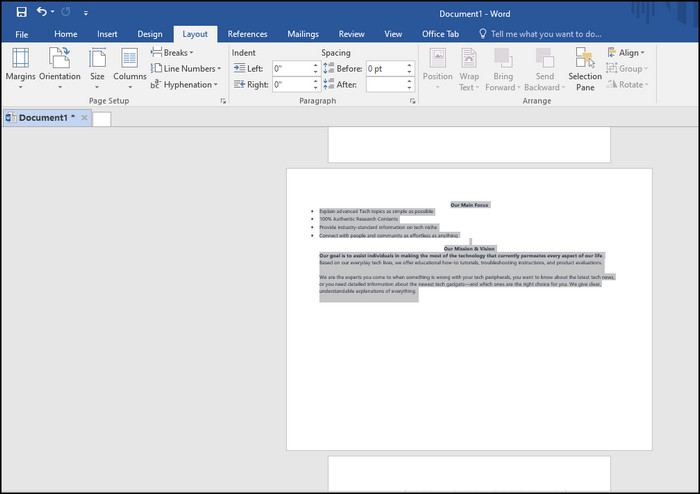
2. Use Section Break
The section break is another way to change the page orientation to landscape in Microsoft Word. It inserts a page break at the start and end of a page and separates the orientation settings.
Follow the procedures below to make one page landscape in Word using Section Break:
- Open the Word document.
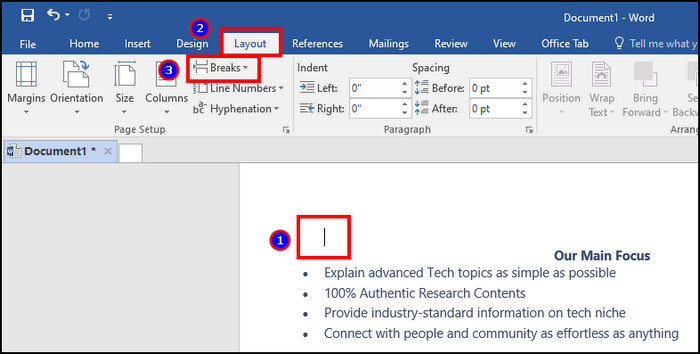
- Place the mouse cursor at the first of the page.
- Go to Layout and click on Breaks.
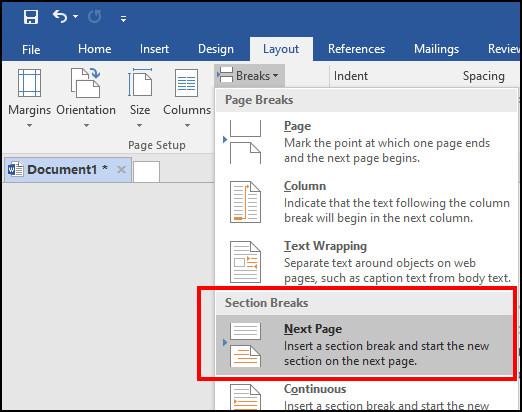
- Select Next Page.
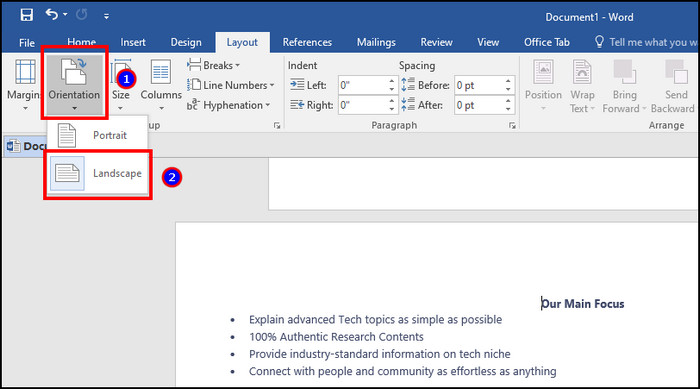
- Click on Orientation from Layout.
- Choose Landscape.
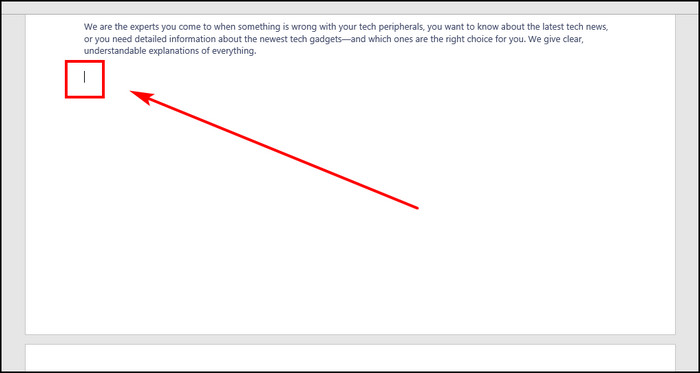
- Place the mouse cursor at the end of the page.
- Click on Break and select Next Page.
- Press on Orientation and select Portrait.
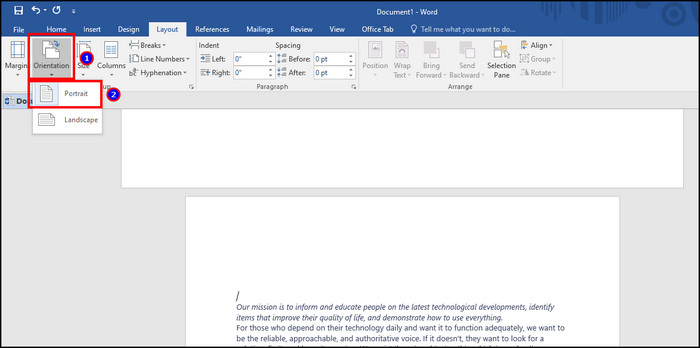
This process lets you keep the portrait and landscape in the same Word document. Moreover, when you print the page in Word, it will print in landscape format.
How to Change Part of a Document to Landscape in MS Word
To make a specific part of a document landscape in Microsoft Word, select the text, table, chart, or image and choose the page orientation from portrait to landscape from the Page Setup dialog box. The selected part will be separated and placed on a new landscape page.
Read the process below to change part of a document to landscape in Word:
- Go to Microsoft Word.
- Open the document.
- Select the part you want to change to landscape.
- Go to Layout.
- Click on the Page Setup dialog box.
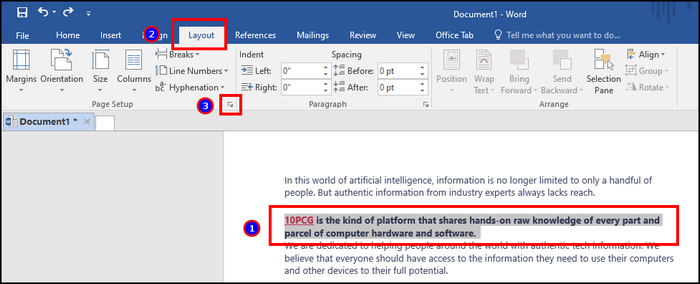
- Select Landscape.
- Choose Selected text from Apply to.
- Press on OK.

It will change the selected part’s orientation and be placed on a separate page.
How to Change the Orientation of Whole Document in MS Word
There are two types of page orientation, portrait and landscape. You can change the orientation of the whole document to landscape or go back to portrait if you are already in landscape mode by selecting the orientation from the Layout tab.
Follow the procedures below to change the orientation of the whole Word document:
- Open the document in Microsoft Word.
- Go to the Layout tab from the top.
- Click on Orientation.
- Choose Portrait or Landscape.
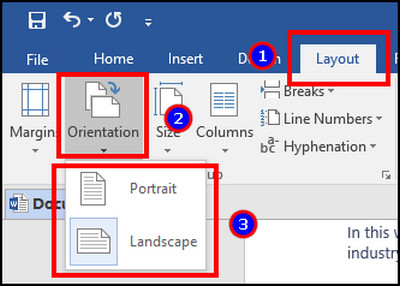
It will switch the orientation of the whole document. The page’s text, table, image, chart, and other content will change to portrait or landscape.
How to Make Landscape Mode Your Default Orientation in Word
The Microsoft Word document orientation is set to portrait by default. You can change the default orientation from portrait to landscape by selecting the mode from the Page Setup dialog box under the Layout tab and setting the changes as default.
Consider reading the following procedures if you want to create landscape documents by default.
Here are the steps to make landscape orientation default in Microsoft Word:
- Open the Microsoft Word document.
- Navigate to the Layout tab.
- Click on the Page Setup dialog box.
- Choose Landscape.
- Press on Set As Default from the bottom.
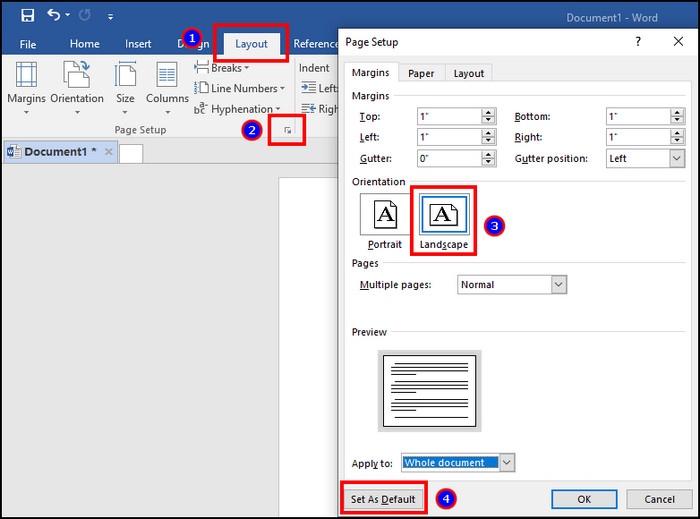
The changes will apply to all the newly created documents. Every Word document will start with the landscape mode afterward.
Frequently Asked Question
Can you change page orientation for just one page in Word?
Yes, you can change page orientation for just one page in Microsoft Word by changing the page orientation from Page Setup or creating a page break and setting the orientation for a single page.
How do you make one page portrait and another landscape in Word?
The page in the Word document is set to portrait by default. All you need to change is the orientation to the landscape from the Page Setup or using Page Break.
How do you change the orientation of one page in Word with a page break?
You can change the orientation of a single page by using the Page Setup dialog box. To change the page to landscape, select the text > Layout > Page Setup > Landscape > Selected Text > OK.
Ending Note
The landscape is the perfect orientation when working with images, tables, charts, and it’s no different when inserting it in the Microsoft Word document.
This article has provided effortless ways to make a single page landscape and keep the other pages the same as before.
I hope you’ve found the article helpful and are using it for your documents.
Cheers!