If you want to verify whether a SharePoint site is active, the fastest & most straightforward way is to check when was the last time users attached or customized docs on it. Alternatively, if you want to organize the site by removing old unused lists & libraries, then what’s the best way?
You can find these by showcasing documents on the SharePoint site based on their last modified date. I will guide you to do the task quickly in this article, so let’s dive in.
So whether cleaning up ancient inactive files or taking a glimpse of recently revised files, you have to identify the files. And the best way is to sort the files with the last modification date. That way, you can distinguish which files are accessed regularly & which are rotting in a corner.
You have to boost SharePoint user adoption to get the most output from the app, as it offers excellent & diversified customization features to its users. Below, I will show how you can take various approaches to show the last modified documents.
Alert Alert!
If you want to be up-to-date about your SharePoint site’s recent activity & get notified when a file gets modified on the Sharepoint site, you can configure the alert feature in SharePoint. This is a great way of keeping track of last modified documents in SharePoint.
You can set the alert option for a specific file or a whole list & library. To enable the alert me feature, follow as below,
Enable Alert For Specific File
- Go to the file’s location on SharePoint site.
- Select the file & click on the horizontal ellipsis.
- Pick Alert me.
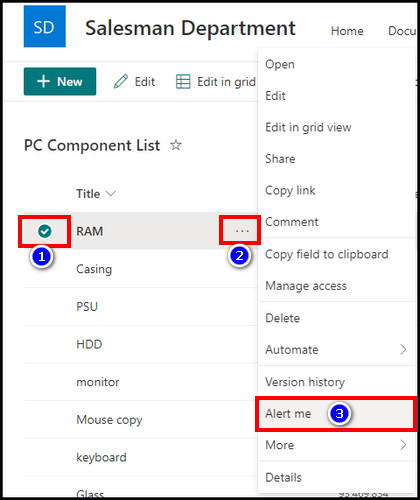
Enable Alert For The Entire Library or List
- Navigate to the SharePoint list or document library.
- Click on the three dots from the ribbon.
- Select Alert me.
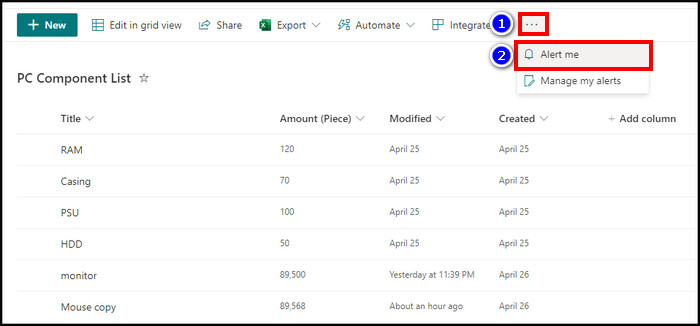
After selecting Alert me, you will get preferences to customize the notification option, such as, you can choose to whom it will send the alert, by which method, or how frequently it will send alerts, etc.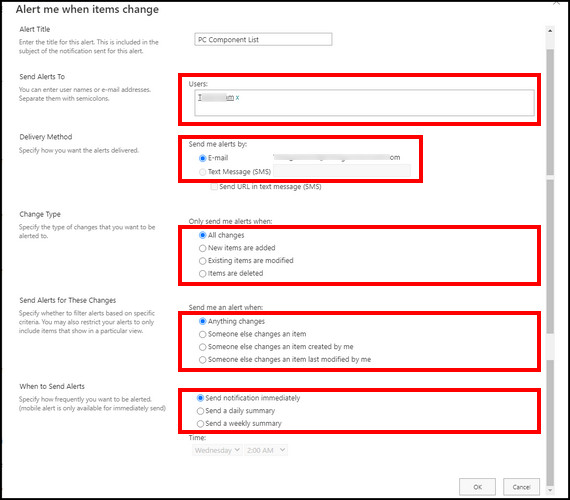
But no one wants to receive too many daily notifications because a person thinks he needs to change title font & style thrice in an hour. This is why you should read the following methods of this article to manually figure out which files have changed recently when you get the time.
1. Add Highlighted Content Web Part
This is the best method I use to determine recently modified documents on SharePoint. A few months ago, I needed to reorganize my SharePoint site. So, I was looking for a solution to find out the oldest unused files to clear up things. After some research, I found that there is a web part that helped me filter out the files.
On the SharePoint Home page, there is a Highlighted content web part, that can sort contents from multiple sources to display the newly adjusted documents.
This web part has various options that help to specify which things you need to display. You can pick the Sharepoint content types, source, document type, etc. This is the reason I listed it as the top. Now, to add the web part,
- Navigate to your SharePoint site home page.
- Click on Edit from the top right side.

- Scroll down to the bottom, hover the mouse in the middle & click on + icon.

- Search highlighted content & select the web part from the result.
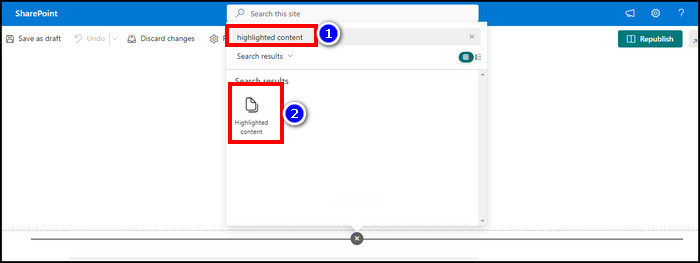
This will display the most recent documents on your SharePoint site. You can edit the web part & customize the section according to your needs. After that, hit Republish from the top right.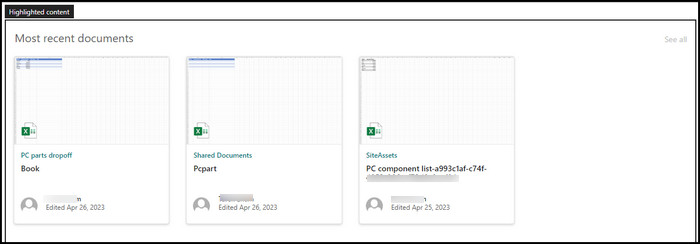
Now there are two other web parts that can help you display newly edited documents. So let’s check out how those things can help you.
2. Use Recent Document Web Part
The name can give goosebumps to you to use it first as you are looking for recent documents. You can also accuse me of why I didn’t mention it at first. Well, I will clarify this right away because this confuses the users.
Like the name, the Recent document web part shows…. well, obviously, the latest documents. But there is a catch. This web part showcases all accessed & modified files from all Sharepoint sites & also from OneDrive. In addition, the edited files are only by the user who is logged in only.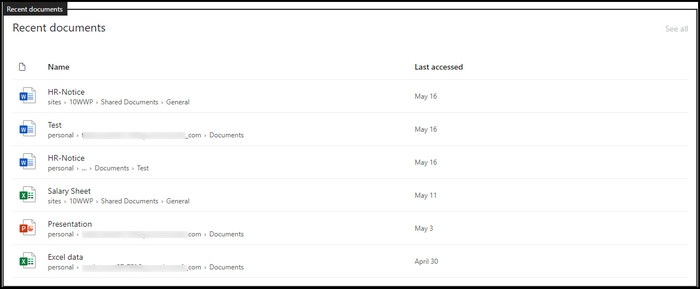
From the image, you can see that I have various files from different sites & OneDrive. Also, the files are accessed by me as I’m the user who is logged in. So during user adoption training, you should mention this.
However, if you want to use the Recent document, click on Edit on the SharePoint Home page, click on + to add a new web part, search recent document & add the web part. If you select the web part & click Edit, you can set the Maximum number of documents to show.
If you want to check out the other alternative web part, continue reading.
3. Try Site Activity Web Part
This is the third web part option you can choose to view recent documents in SharePoint. But the reason I’m mentioning this later is, this Site activity web part displays all recent activity within the site. This means it shows recently modified documents, lists, announcements, pages, etc.
So you can’t differentiate only the latest modified documents with this web part. In addition, the web part only offers to edit how many items appear at a time. 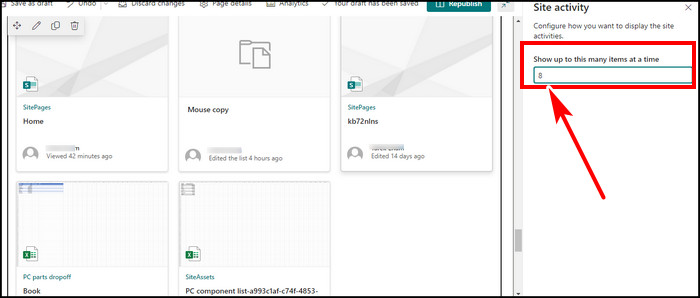
Like the other two web parts mentioned above, you can add this web part from the SharePoint home page & try the feature.
Besides the web parts, you can see last edited in SharePoint through information details pane. To get this, navigate to your SharePoint list or document library. Click on the 🛈 icon to Open the details pane. Below More details, you will find the activity sorted by recent changes.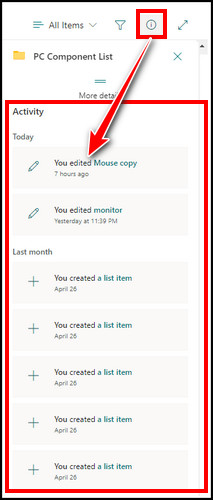
Another solution to see recent documents in SharePoint is to create a custom view with the modified column. To get a view with modified files at the top,
- Click on the Create new view after clicking on All items in the SharePoint site.
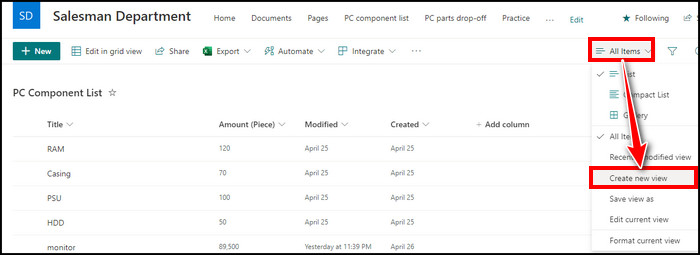
- Give a name & select the view.
- Select the view & select Edit current view.
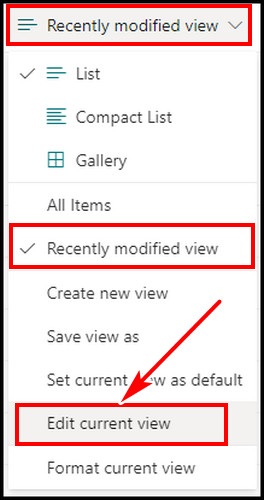
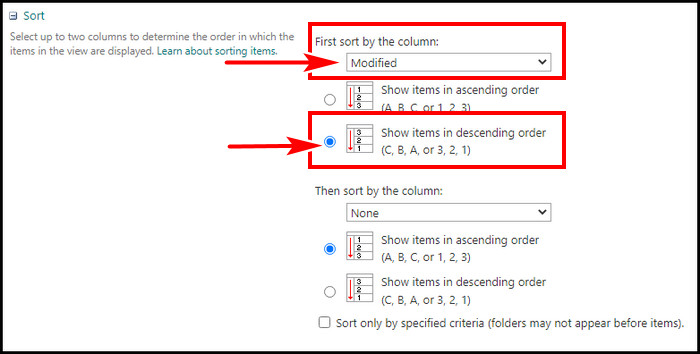
- Scroll down, find Sort section & expand if it isn’t yet, pick Modified for First sort by the column.
- Choose Show items in descending order.
- Scroll below again, find Folder section, expand & select Show all items without folders.

This will create a new column named Modified & sort the files with recently edited documents in descending order. It is usually recommended to stay away from folders in SharePoint, but if you still take that path, you must pick show all items without folders to get the modified view for all items.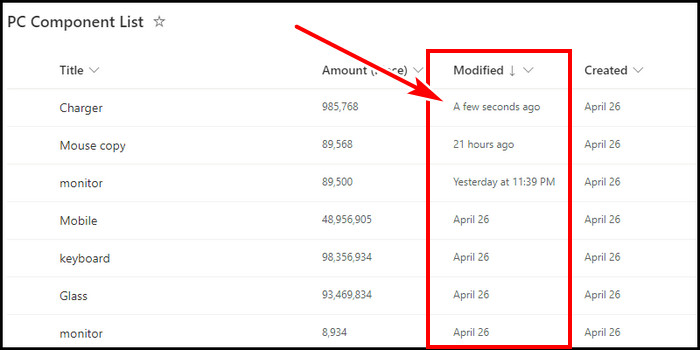
FAQs
How do I track changes in SharePoint Word?
If you create a Word document file in SharePoint, you can enable track changes & review them. To do that, open the Word doc > Select the Review tab from the top ribbon > Click on Track Changes > pick For Everyone or Just Mine according to your need. If you want it to disable, click on the Track Changes again & select Off.
Can you see version history in SharePoint?
In SharePoint online, you can see the version history of a file. To find version history, select the file > click on the three dots(…) beside it > select Version history. You will see all the version history with the version number to track changes.
Conclusion
By showing the most recent documents, one can know which files or documents are regularly modified. Also, an owner or admin can take action to find out junk content & by removing those useless documents, they can make the user experience more smooth. In this article, I described all the possible ways to display modified documents in SharePoint & this will help you.