Microsoft Outlook stores its data as OST, PST, and NST files so that users can access essential messages, calendars, contacts, etc, while offline.
Most Outlook consumers are aware of OST and PST files but have little understanding of the NST files. If you’re one of them, don’t worry. Throughout this article, I will explain everything about this file extension.
Without further discussion, let’s get started!
What is an NST File in Microsoft Outlook?
Outlook NST, also known as GST (Group Storage Table), is a storage file that stores the data of a group of Office 365 for offline usage. The structure of NST is identical to the Outlook OST files. An NST file is created by the Outlook connector add-in, which assists in using IBM Notes on Outlook.
If you’re using Outlook for your MS 365 Groups, you will find the NST files with the same text label as the OST and PST files.
But what is the Outlook .nst file used for?
Well, the NST file creates a local copy of Office 365 groups so that you can access these group conversations in an offline mode.
The location of the NST file is the same as your OST and PST files. The default location may vary depending on your Outlook and Operating System versions. Following are the possible locations of Outlook NST files:
- On Windows 7,8,10, and 11:
- C:\Users\username\AppData\Local\Microsoft\Outlook\
- On Windows XP:
- C:\Documents and Settings\username\Local Settings\Application Data\Microsoft\Outlook\
Another important thing to consider is the NST file size. Depending on the MS 365 group data, the file size of an NST can be gigatonic. However, an NST file usually takes up only a little space on most systems.
Are Outlook NST Files Deletable?
Yes, you can effortlessly delete Outlook NST files from the exact location where the Outlook OST files are stored. If your disk space is running low and Outlook is creating multiple NST files, you can delete or compress the NST files using NTFS to free up some storage.
But should you really delete Outlook NST files?
Deleting Outlook NST files won’t do anything miraculous. As the NST files are not affecting your day-to-day Outlook experience or saving a considerable amount of storage, it is suggested not to delete them unless it takes a ton of storage.
However, if you want to get rid of Outlook NST files, you may think you should create a backup before deleting the files.
Well, it is 100% safe if you obliterate the NST files, so don’t worry about keeping a backup because Outlook will auto-generate NST files once it finds them missing.
In case the storage space occupied by the NST files is your concern, remember there are far better ways to free up your storage, such as you can clear Outlook cache files to eliminate unnecessary files.
If you still want to delete the NST files, go through the following instructions to remove corrupted NST files from Outlook.
Here are the steps to delete .nst files from Outlook:
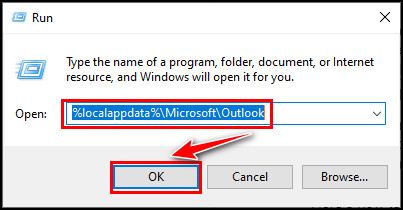
- Open the Run dialog box by pressing the Windows + R keys.
- Type %localappdata%\Microsoft\Outlook in the text box and hit Enter.

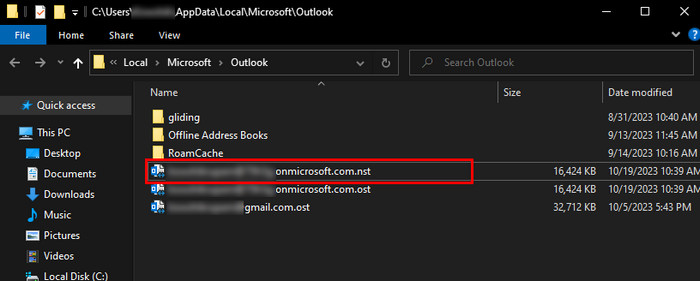
- Locate the file with the .nst extension.

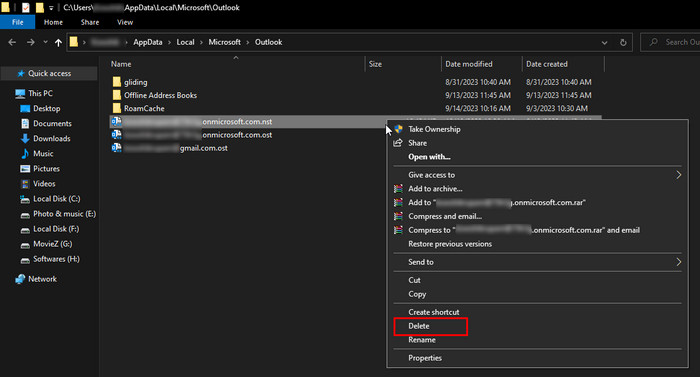
- Right-click on it and select Delete from the context menu.

As I mentioned earlier, deleting the NST files will not permanently remove them unless you delete the Outlook profile and create a new one.
What if you convert it to an OST file instead of deleting?
Fortunately, you can convert an NST file to an OST file using several free third-party converters. Converting the files allows you to access them using the Outlook desktop client, and then you can effortlessly delete the OST files in Outlook to get rid of the NST files.
How to Create an Outlook NST File?
Outlook automatically creates NST files for your Microsoft 365 groups. For each Microsoft 365 account, Outlook creates a new NST file and stores the data for all Groups. Consider the subsequent procedure to add a new Microsoft 365 account in Outlook to create an NST file.
Here’s how to create a .nst file in Microsoft Outlook:
- Launch the Outlook desktop app on your PC.
- Navigate to File > Add Account.
- Add a Microsoft 365 account in Outlook.
- Wait until you see a message saying we’re getting things ready.
- Type the Password for your 365 account and click OK.
- Select OK when the Mail Delivery Location appears.
- Wait for the confirmation and click OK.
Now, Outlook will configure all the emails from your Office 365 account. This may take a while, depending on the database size. Once the process is completed, you can head to the Outlook folder on your local drive and access the newly created NST file.
Frequently Asked Questions
What is the difference between NST and OST files in Outlook?
The main difference between Outlook NST and OST files is what they store. While the OST files store the emails and Outlook folders, NST files store the group conversations and calendar info of the Microsoft 365 accounts.
Is it safe to delete OST and NST files?
Yes, it is 100% safe to delete OST and NST files from Outlook. You will lose no data as the OST file will download the data from the Exchange Server, and Outlook automatically recreates the NST file even after deleting it from the source.
How do you convert NST files to OST?
To convert our Outlook NST files to OST, go to the Outlook folder in your local storage, locate the NST file, right-click on it, and change the file extension from .nst to .ost. It will convert your NST files to OST files.
Wrap Up
Obviously, you can effortlessly locate and delete Outlook NST files from your local storage. However, removing the NST won’t add any value because of their compact and tiny file size.
The only way to permanently remove the NST files is to remove the Outlook profile and add a new account that doesn’t have any Microsoft 365 group.
Need further assistance regarding this topic? Don’t hesitate to comment below.