After running your gaming PC for several months, you find out the processor is heating up a lot. So, you decided to change the thermal paste. While applying the paste, you couldn’t decide how to apply it in a perfect amount.
So, Why apply the thermal paste with a certain amount and is it really a matter of concern?
 Well, it’s always been a matter of debate. Along with you, many other PC enthusiasts around the globe find this pretty confusing.
But not for long because after experimenting, I found perfect ways to apply thermal paste to the processor. So, read till the end to know the best ways to apply thermal paste.
Now, let’s begin without further stir!
What is Thermal Paste & Why Do You Need it?
Thermal paste is also known as thermal grease or thermal compound. It is a substance used to apply between the processor and the heat sink. This paste is mainly made of zinc oxide and silicon, known for high thermal conductivity. So, this paste helps to dissipate the heat faster from the CPU.
When you install a heat sink above the processor, there are small air gaps between them. As you know, the air is a terrible heat conductor. So, for optimal heat transfer, you must get the air out of the way. That’s where thermal paste comes to play.
Applying the thermal paste to the processor fills the gaps between the heat sink and processor and doesn’t let any air in the way.
Moreover, thermal paste is a great conductor of heat due to its ingredients. That’s why heat transfers faster when you apply thermal paste.
What might happen if you don’t apply thermal paste to the processor? Well, in that case, the processor will heat up terribly, and you know heat is the biggest enemy of a processor.
Heat will reduce a processor’s efficiency, which is when the processor will throttle while performing any task. So, the thermal paste must be applied to avoid heating issues and for constant heat dissipation from the processor.
There are also liquid metal forms of thermal paste available in the market. Liquid metal thermal paste is mainly made of Galinstan, which is actually a mix of alloys. Other major mixtures like indium, tritium and ion are also found in a liquid metal thermal paste.
Can Too Much Thermal Paste Kill a CPU?
Too much thermal paste can increase the CPU’s heat instead of reducing or dissipating it. You just need to apply a tiny amount of thermal paste on the CPU, not excessively. Too much will increase the heat and cause your CPU to throttle. Excessive heat can kill a CPU, but it takes time.
Many users reported that their processors died from overusing the thermal paste. After they applied too much thermal paste, they found the temperature rose significantly. Instead of decreasing the heat, the temperature keeps increasing day by day.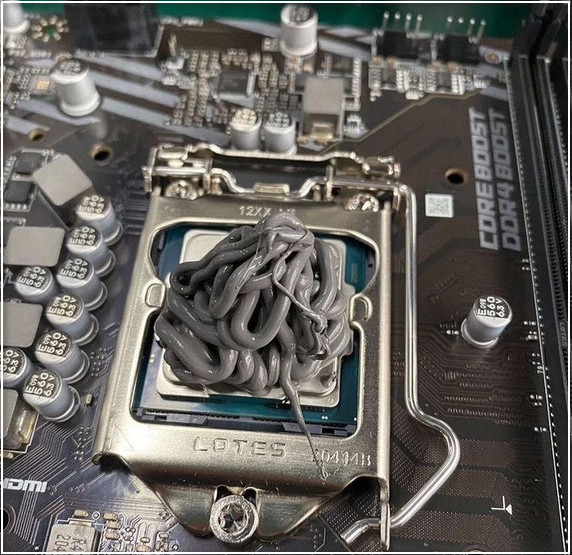 Regular thermal paste has a conductivity of 4-10 W/mK (watts per meter-kelvin). But the aluminum cooler has a conductivity of around 200 W/mK, and the copper heat pipe’s conductivity is around 4000 W/mK.
If you compare the conductivity of the thermal paste against the aluminum cooler and copper heat pipes, it’s nothing. So, an excessive amount of thermal paste won’t be able to transfer heat according to its heat conductivity range.
After applying it, if you don’t monitor the CPU temperature, it can bring chaos. Because day by day, the temperature will rise, and the transistors inside the CPU will get damaged and cause severe damage to the CPU.
Does the Amount of Thermal Paste Matter?
According to many tech geeks, the amount of thermal paste does matter. They applied thermal paste in various amounts and recorded the high temp while running games or benchmarking each time. The experiment results showed that excessive thermal paste could raise the temperature.
So, you need to apply the thermal paste in a small amount and follow specific patterns to get the best thermal result. Thermal paste only fills the microscopic gap between the heat sink and the processor and passes the heat from the CPU to the cooler’s cold plate.
To transfer the heat faster thermal paste is made out of silicon and zinc oxide, which is a great conductor of heat. A small amount of the paste is enough to dissipate heat faster from the CPU to the heatsink. So, the amount is a fact when applying the thermal paste to a processor.
Things to Do Before Applying Thermal Paste
You need to do certain things like removing the CPU cooler carefully, cleaning off the paste, and checking the thermal paste’s thermal conductivity. You must choose the thermal paste wisely before buying one because not all paste has the same thermal conductivity.
Follow the below procedure before applying thermal paste to the CPU.
Here are the things to do before applying thermal paste:
1. Remove the CPU cooler Carefully
Removing the CPU is the first step before applying the thermal paste. If your CPU cooler is installed with some screws, just unscrew them and gently pull off the cooler. After-market coolers are easily removable; you can follow the manual to remove them.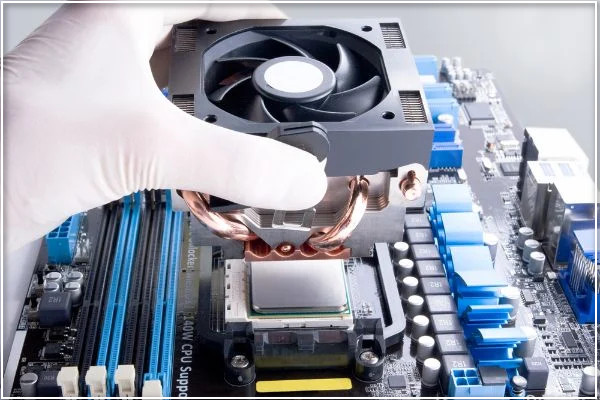 Just search on the net, and you will find how to remove your CPU cooler.
2. Clean Off the Paste
Cleaning off the paste is the second thing you should do after removing the CPU cooler. If the paste becomes hard, you must use the flat end of a spudger to scrap all the stiff paste out from the processor’s heat spreader metal surface.
Please be extra careful while doing it. Next, you will need some cotton balls or cotton swabs and isopropyl alcohol. Use at least 70 percent of the alcohol solution, which will easily clean off the remaining thermal paste.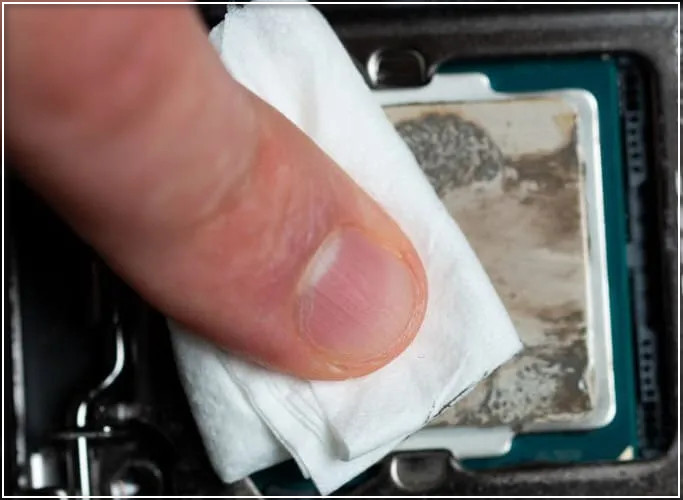 Once you clean it, let the alcohol dry. Don’t touch the processor’s metal heat spreader surface because your fingerprint can obstruct heat transfer.
3. Check for Conductivity
There are several types of thermal paste available in the market. Some paste can conduct electricity, and some won’t. Look for the electrical conductivity in the specs shit before buying one.
There are four types of thermal paste available in the market: silicon, metal, ceramic and carbon-based. Silicon pastes are non-conductive to electricity. But you must be extra careful if you apply a metal-based thermal paste.
If liquid metal thermal paste somehow manages to fall on the board, it will cause harmful short circuits.
All the other variants are non-conductive to electricity except for metal-based thermal paste.
4. Look for Higher Thermal Conductivity
The higher the thermal conduction, the faster it can transfer heat from the CPU. So, look for higher thermal conductivity before buying the paste. Regular silicon-based thermal paste has a thermal conductivity range of about 4-12 W/mk.
But the higher 12.5 W/mk one will cost you more. Moreover, you can also go for the liquid metal-based thermal paste. Those pastes have higher thermal conductivity, like 70-80 W/mk.
Please be extra cautious because metal pastes are highly conductive to electricity, but they can transfer heat faster than any other variants of thermal paste.
So, you should look at these factors before applying the thermal paste to the CPU.
How to Apply Thermal Paste Perfectly
According to experts and geeks, there are several ways you can apply thermal paste on the CPU’s IHS (Integrated Heat Spreader). I have tried all of them and found a few working ones. So, follow the below methods to apply thermal paste to the CPU perfectly.
Here are the methods to apply thermal paste perfectly:
1. Big Blob
It’s the most effective way to spread the heat faster. You only need to squeeze a small amount of thermal paste into the CPU’s IHS. The dropped paste should look like a big blob. The amount you need to drop shouldn’t be too much or too low. Don’t put so much paste, or it will spread outside the IHS.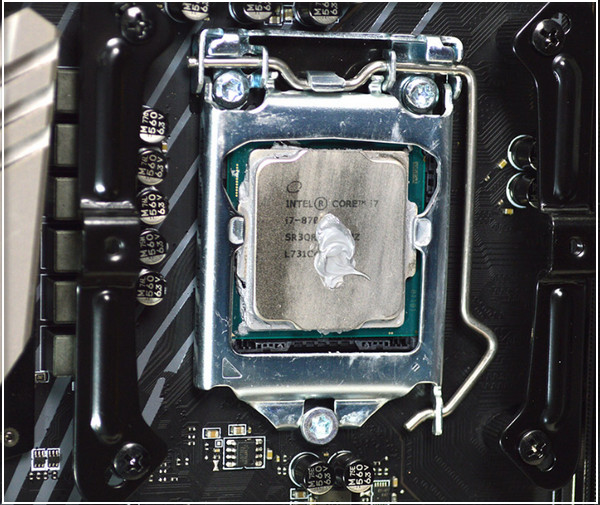 Then install the CPU cooler and push the heatsink gently towards the CPU’s IHS. Give it a little wiggle, and it should spread the paste on the IHS. Don’t worry if you find some silicon paste spread outside the IHS.
This big blob-style thermal paste application method will spread the heat faster.
2. Pea-Sized Dot
It’s the next method you should apply. Most of us use this method to test the CPU temperature when it’s not vital. The pea-sized drop of thermal paste will cover the primary hotspot of the CPU.
Most GPU/CPU manufacturers mainly recommend this method. Tech bloggers and other professionals suggest this method too.
All you need to do is squeeze a little drop of paste, which will look like a pea. Then install the CPU cooler on the CPU’s IHS. Just give it a gentle pressure and wiggle it a little will spread the paste in the entire IHS.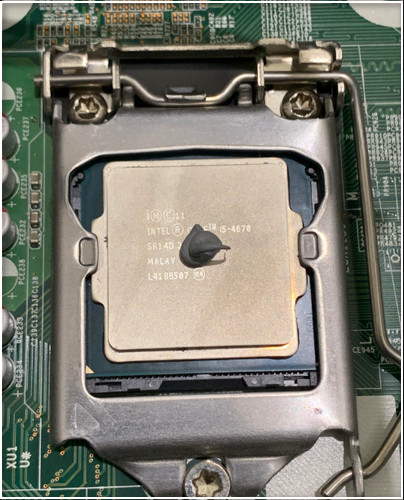 You may find some corners of the IHS aren’t covered by the paste but let’s not worry about that. The primary heat only spread from the middle. So, applying this method will effectively transfer the heat from the CPU to the cooler’s heat sink.
3. Thin Spread
You are going to need a spatula to apply the thin spreading method. Reputed thermal paste makers like Cooler Master, Noctua, Arctic, and Thermal Grizzly include a spatula in the package.
Just put a tiny amount of thermal paste into the IHS and use the spatula to spread the paste in the entire IHS. This method aims to spread a thin layer to ensure maximum contact between the cooler’s cold plate and the IHS.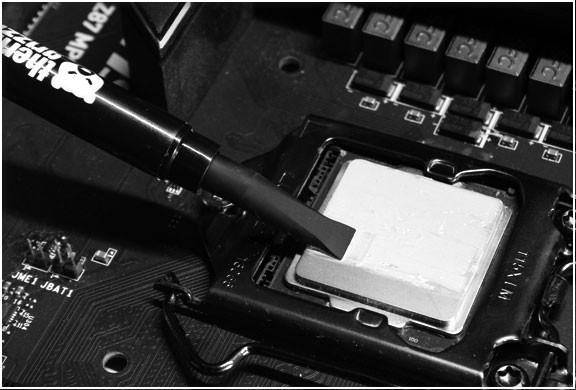 Spreading the paste with the spatula will thin out the paste, making the gap between the two as small as possible. But uneven surfaces could trap air bubbles when you pressed the cooler to the IHS. Let’s not worry about this because no one has reported a negative impact of this thin-spreading method.
So, you can entirely rely on this method, and it’s to clean up. You won’t find any spreading paste outside the IHS, even after pressing the cooler against it.
4. The X-Shape
You can use the X-Shape thermal paste application method when the CPU is more prominent in size than a regular CPU. If you’re using a powerful AMD threadripper APU, you must apply the paste with the X shape.
Applying the thermal paste like an X shape will cover the entire IHS plate. All you need to do is apply the paste from one corner of the IHS diagonally to another corner. Then repeat the same on the opposite corner, just like drawing an X shape.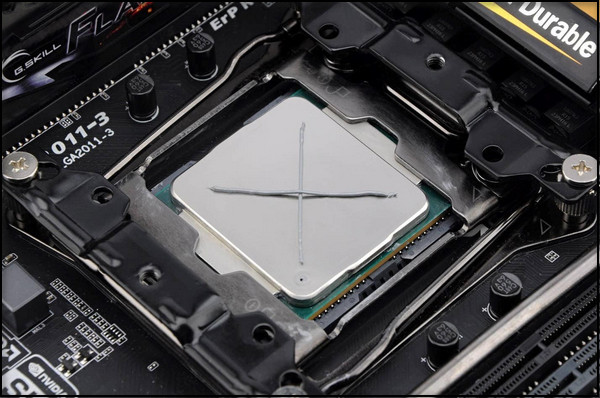 The paste will spread each corner when you push the CPU cooler’s cold plate against the IHS. When I ran a test after applying thermal paste in an X-shape, the thermal state remained idle like other methods.
Note: Not every thermal paste syringe comes with the same-sized nozzle. Gently squeeze the syringe’s barrel to avoid pouring too much thermal paste on the CPU.
The above methods are well known and capable enough to maintain the idle thermal state of the CPU. I suggest not using too much thermal paste on the CPU, which may result in high temperature.
FAQs
What happens if you use too much thermal paste?
Applying too much thermal paste will make the paste work like an insulator. Doing so will make the paste ineffective and heats the CPU even more. Running your PC with that much thermal paste may damage the component due to overheating.
How do I know if I put too much thermal paste?
If you think you have applied too much thermal paste, check the edges of the CPU. The paste might spill over the CPU’s edges after you put too much of it. Over-applying it may damage the CPU socket by damaging the pins.
How to clean thermal paste?
To clean the thermal paste from the CPU’s IHS, you will need a cotton ball or good quality microfibre fabric and isopropyl alcohol. Soak the cotton ball or the cloth with isopropyl alcohol and gently rub off the paste. Next, wait for the alcohol to dry off.
Can too much thermal paste damage the CPU?
You should apply a small amount of thermal paste on the IHS, not too much. Too much of anything isn’t good. Applying too much thermal paste can damage the motherboard or its sockets.
Is 1g thermal paste enough?
1g thermal paste may sound too small, but it’s pretty effective enough to cool down the CPU. For effective heat dissipation, you must use 3x the amount of paste on the IHS to spread the paste entirely on the IHS.
Final Words
Without thermal paste between the CPU and the cooler won’t pass the temperature effectively. Running your PC without applying the paste may result in a high CPU temperature.
This could make your PC stutter or even shut down due to reaching the temperature to the maximum limit. But don’t put too much thermal paste on the CPU. Instead of cooling down the CPU, it will do the opposite.
I hope you know the best ways to apply the thermal paste if you read this article till the end. Choose one and apply it carefully. Don’t pour too much, or it will spread inside the CPU socket.
Do you need further assistance? Let me know in the comment section. Peace out!