While you are working on your laptop and an irritating window like Skype opens. Even worse, there’s nothing you can really do to stop it from restarting after a few minutes. Your attention, convenience, and calm are all taken away by it.
I know how painful this is. I am also a regular PC user. You should stay away from disturbances when focusing on anything vital. But a problem something like this hampers your productivity and forces you to stop your task.
But don’t take any pain at all. I am here to get relief yourself. I will provide a piece of outstanding information with solutions. Thus you can fix your Skype starts unexpectedly on your OS problem in such easy ways.
Why Does Skype Start Randomly on Your Windows?
Skype starts randomly on your windows because of improper application and operating system settings. But another common factor that can cause such a problem is that the Skype application is affected by malware. The always logged-in feature is also a culprit for this issue.
Here is a brief description of the causes,
Enabled as Start-Up Program: In Windows OS, there is an option called Automatic start-up functions. This means when you turn on your PC then, all the authorized applications gets started at the same time.
If your Skype app gets such settings enabled, then it is a very common phenomenon you can experience. Custom image using the causes
Improper application setting: In the Skype application, there is an option called Automatic start. This means when you turn on your operating system then, this application will also start automatically at that time.
You should disable such settings because these setting sometimes seems improper and also resource-hungry for the computer.
Malware: No system is free from cyber threats or malware viruses. Any virus will attempt to take over your device’s configuration and features. For the users, it always causes this type of problem.
Always logged-in feature: Many users forget to Logout once after using any social media. But this isn’t right anyhow. This may lead the program to start up randomly.
You should always log out when your session is completed and done.
Your Skype random start issue may potentially be caused by a few other factors. I am aware of how frustrating and complex it may be to identify the precise problem and an ideal remedy. But remember that it is totally a software-related issue and very easy to fix up.
I did promise to provide you with the best and simplest answer. So kindly read the details and adhere to my step-by-step instructions.
How To Fix Skype Randomly Opens Windows 10
The most frequent solution to stop Skype from starting at random is to turn off the auto-start feature.
But just in case this doesn’t work, and you continue to experience this issue, I’ve included every workable option.
Here are the steps to fix Skype Randomly Opens on Windows 10:
1. Set Skype Settings
Skype auto-start settings have to be checked. To ensure the proper settings follow these instructions below,
- Open the Skype application.
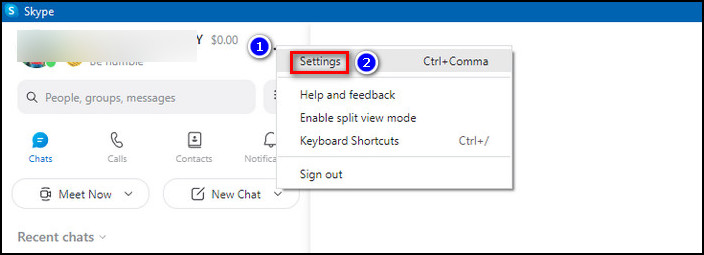
- Find the menu option. It is in the top right corner of your display, labeled as Three dots.
- Click on the Settings option.
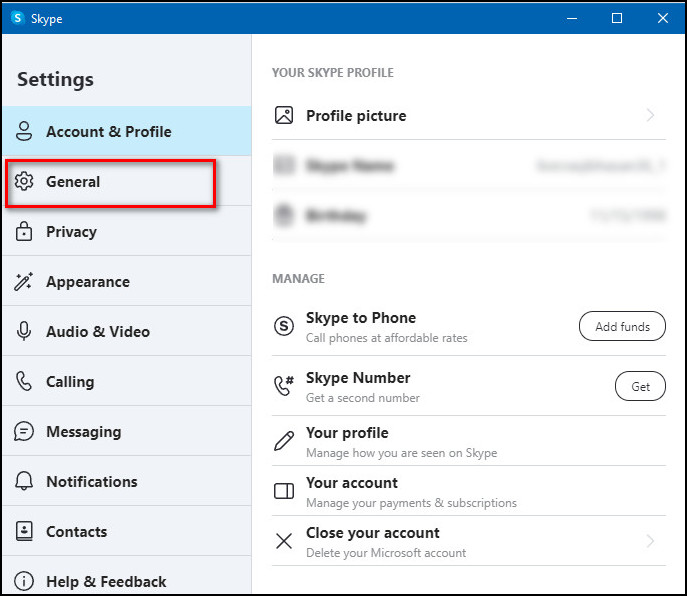
- Select General from your left sidebar.
- Turn off the option named Automatically start Skype.
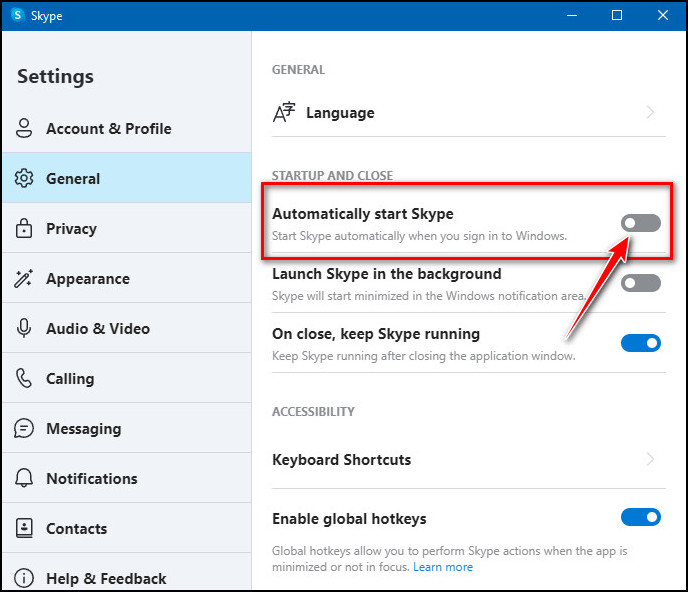
Check to see if your problem has been fixed now. Try the following strategy if the first one doesn’t work for you.
Here’s a complete guide on how to reduce RAM usage in Windows 10.
2. Set the Proper OS Settings
One of the programs that open when your system is switched on may be your Skype, which might stay in the background without your permission and reappear at random.
Disable Skype from Startup applications so that it won’t operate in the background.
Follow these steps below,
- Search the Settings option from your windows search menu.
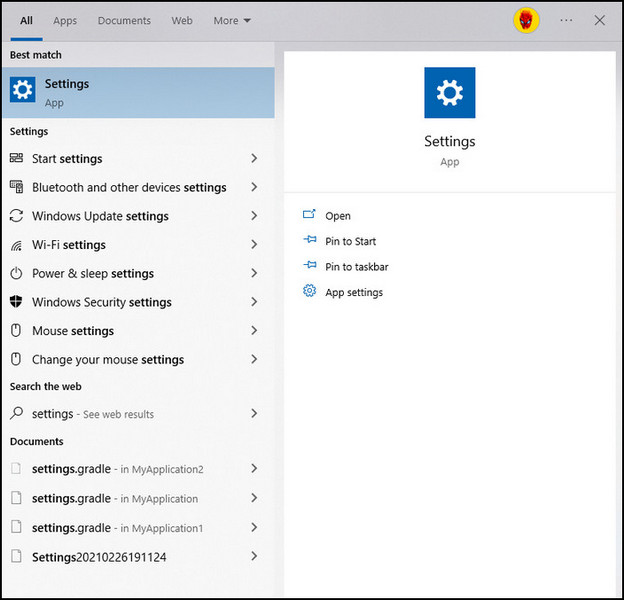
- Select the Privacy option.
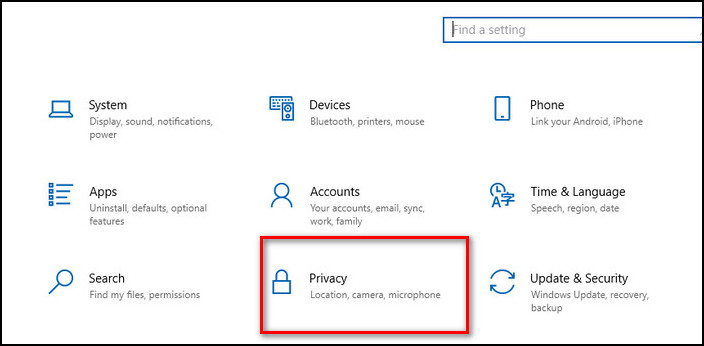
- Choose the Background Apps option from your left sidebar.

- Find the Skype application and disable it.
From now this application won’t be operating on your system’s background anymore. So, check to see if your problem has been fixed now. Try the following strategy if it doesn’t work for you.
See our most recent post on adjust page file in Windows 10.
3. Disable Skype When Your System Starts
When you turn on your PC then, all the authorized applications get started at the same time. So, your Skype app gets such settings enabled. You have to disable it.
Follow these steps to disable the start-up setting,
- Search the Settings option from your windows search menu.

- Select the Apps option.
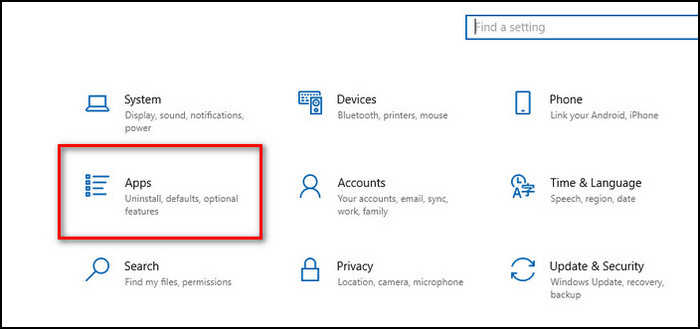
- Find the Startup option from your left sidebar.
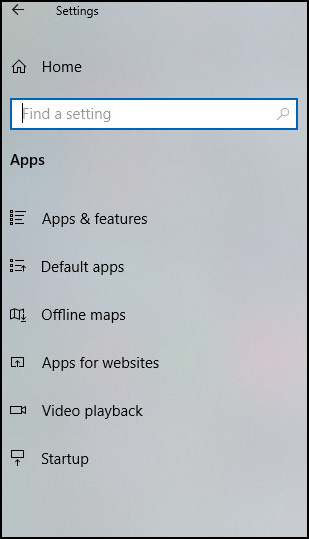
- Find the Skype application and disable it.
From now on, this application won’t be starting when your system launches anymore.
Only if you open this application, then will it operate on the OS.
Now, check again to see if your problem has been fixed now. Try the following strategy if it didn’t work for you.
Also, check out our separate post on what are the disadvantages of not activating Windows 10.
4. Logout From Your Skype Account
If you forget to Logout once after using the Skype account, then this may lead the program to start up randomly.
Always try to log out when your session is completed and done. Follow these steps to log out from your Skype account,
- Run your Skype application.
- Find the menu option. It is in the top right corner of your display, labeled as Three dots.
- Click on the Sign out option.
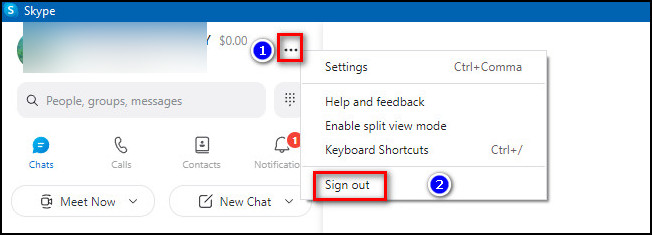
- See a pop-up window that appears named Sign out.
- Click on the option Yes.
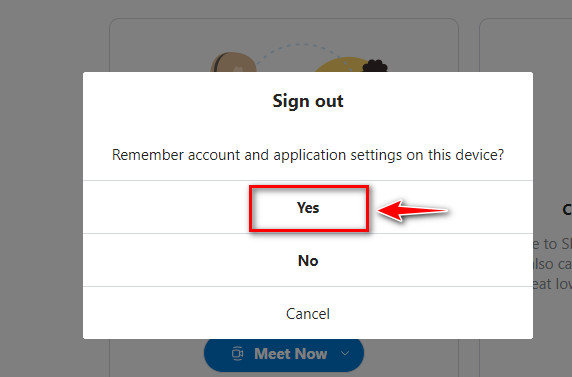
Now you have successfully completed your Skype Sign out. Check again to see if your problem has been fixed or not.
If you are still struggling, then follow this vital step.
Follow our guide to fix HDR washed out Windows 10.
5. Remove Viruses from Your PC
If your computer is being attacked by malware or a virus, the computer may act strangely and launch Skype at unexpected times. Completely scan the system to check for viruses.
Follow these steps to perform a scan without any third-party software,
- Search the Windows Security option from your windows search menu.
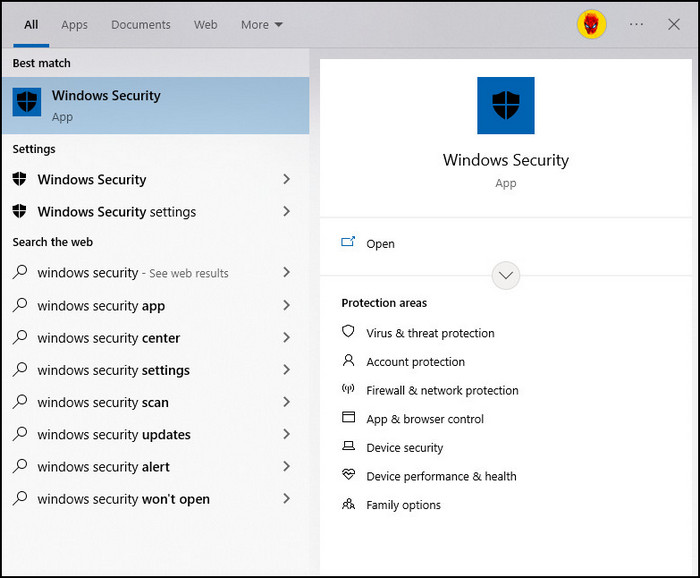
- Find the Virus & threat protection option from your left sidebar menu.
- Select the Scan options.
- Click on the Full scan option.
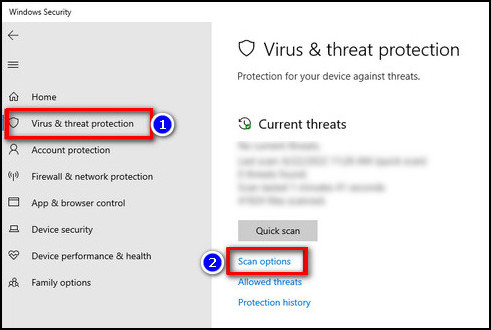
- Click on the Scan now button.
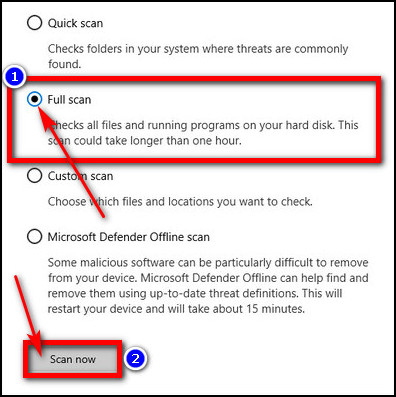
Now, wait for the process to be completed. Your OS will automatically detect any malware and will remove it from the system.
But some viruses are so strong and updated that the Windows Firewall can’t detect them. In this case, you should use any third-party application.
Threats, including viruses, malware, and Trojan horses, may infect any system. It is preferable for you to use third-party applications. Install a reputable security program, then scan your computer for infections.
If your computer is clean of any viruses, but your problem is still not fixed, try the following strategy.
Follow our guide step-by-step to activate Windows 10 auto login.
6. Use Skype Web Browser Version
If you are so tense and anyhow you have to get rid of this problem, then I recommend you to use the Skype Web Browser version instead of using the desktop application version.
Follow these processes below,
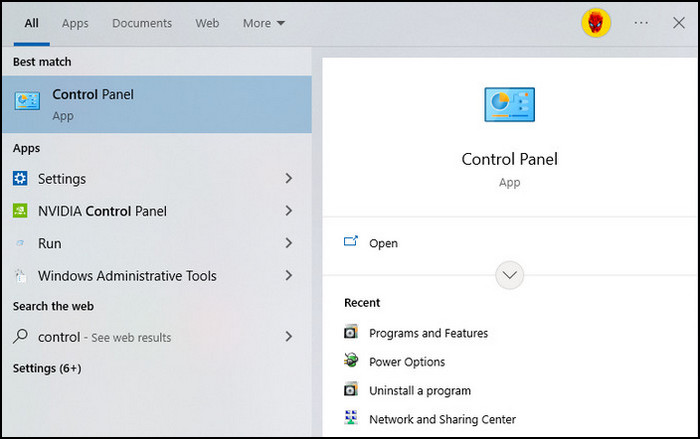
- Search the Control Panel option from your windows search menu and click on it.
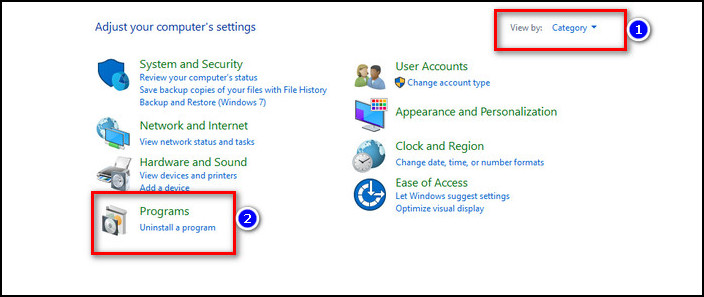
- Set the View by option as Category.
- Click on the Programs option.
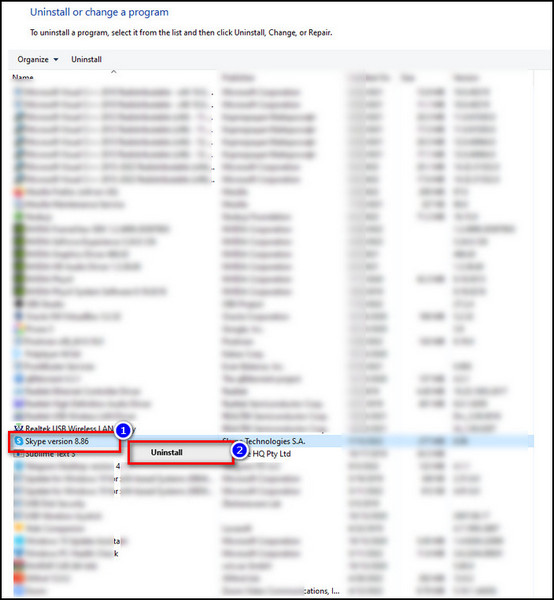
- Select Skype from the list.
- Choose the Uninstall option.
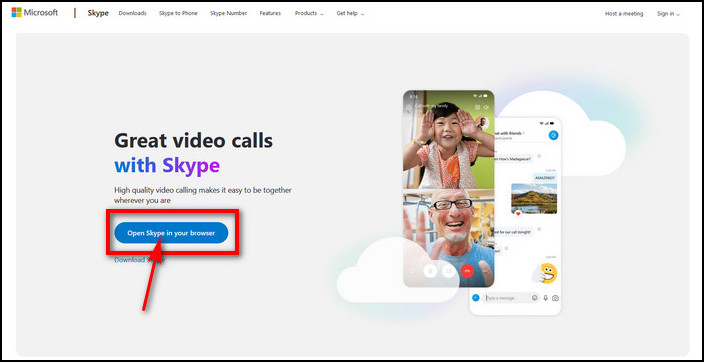
- Start your Browser.
- Type skype official website on the Google search bar.
- Click on the first link.

- Click on the button named Open Skype in your browser.
- Enter your information and password to sign in to your Microsoft account.
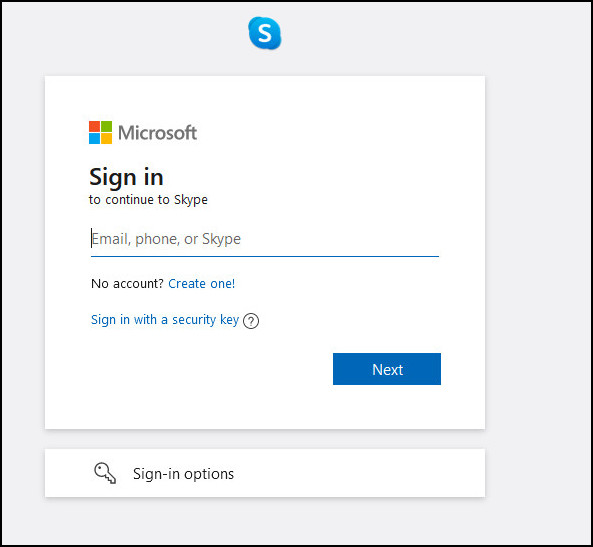
After this, your skype account will run in your current browser. Check again to see if your problem has been fixed or not.
Still no success! I see!
Don’t get upset. Follow the next step, which may be an alternative medicine for your Skype problem.
7. Use an Up-to-Date Version of the Skype Application
The only method to fix out-of-date apps when they start acting strangely is to upgrade them. Check your Skype application and update if you’re still using an outdated version.
To fix the problem, this one can be a must-followed rule. Follow these steps to check and update your Skype desktop application version,
- Run your Skype application.
- Find the menu option. It is in the top right corner of your display, labeled as Three dots.
- Click on the Help and feedback option.
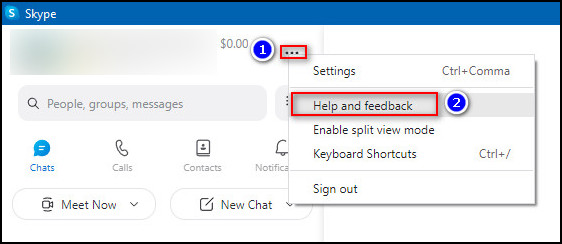
- See if you find something like this then your application is outdated and it is updating now. If you don’t see something like this then your application is updated for sure.
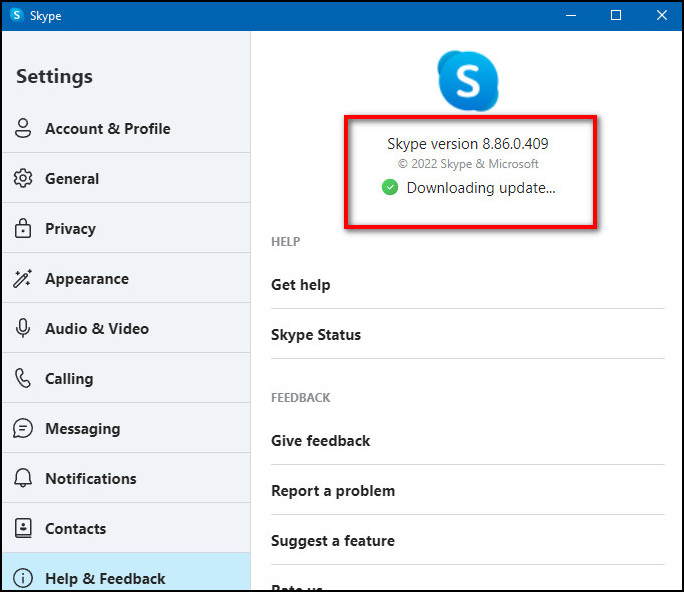
Now, check again to see if your problem has been fixed now. Try the following strategy if it didn’t work for you.
8. Set Proper Headphone Settings
The majority of Skype users use headsets to chat with one another, and some may continue to wear them long after a call has ended.
It’s possible that they unintentionally press the emergency button on their headphones, allowing Skype to display the dial board for you.
Follow these steps to set proper headphone settings for your Skype application,
- Search the Control Panel option from your windows search menu and click on it.

- Set the View by option as Category.
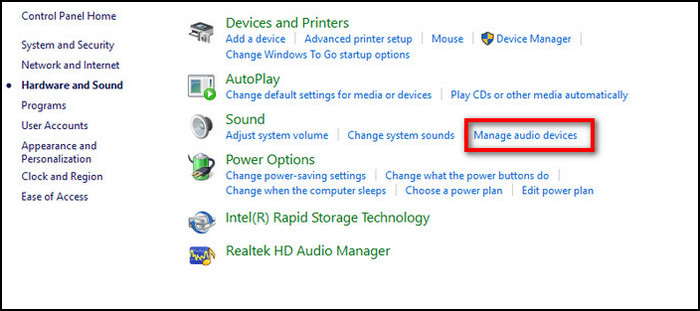
- Click on the Hardware and Sound option.
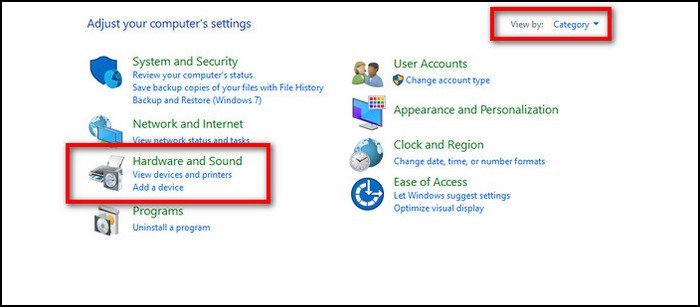
- Click on the Manage Audio Devices option under the Sound section.
- Choose the Playback section.
- Find your microphone from the list and select it.
- Click on the Properties button.
- See a pop-up window and Select the Advanced section from it.
- See a checkbox there named Allow applications to take exclusive control of this device. Disable it.
- Click on the OK button.
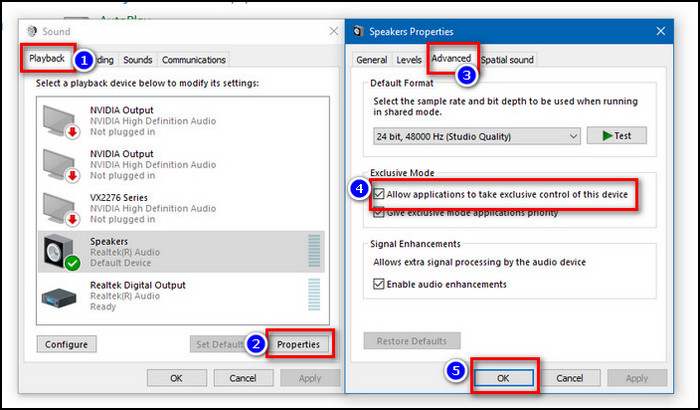
Once you turn off this function, Skype is almost certain to neglect your headphone instructions.
Now, check again to see if your problem has been fixed now. Try the last strategy if it didn’t work for you.
9. Report to Skype
If you are helpless and none of those above-mentioned tricks didn’t help you, then you can report your problem to the Skype support team.
It is also a very effective method to get rid of the issue. Don’t hesitate to get help from the Skype highly skilled support team.
Follow these steps below,
- Run your Skype application.
- Find the menu option. It is in the top right corner of your display, labeled as Three dots.
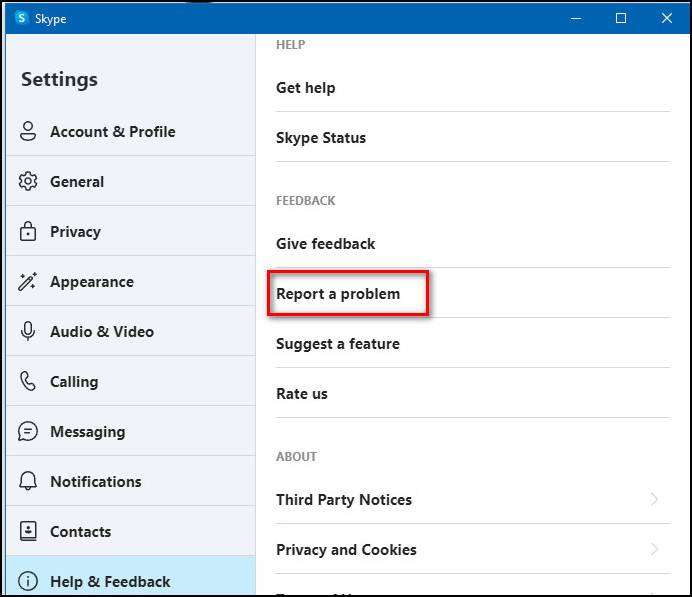
- Click on the Help and feedback option.

- Select the Report a problem option.
- Write your problem, take the screenshots and send them to the support community.
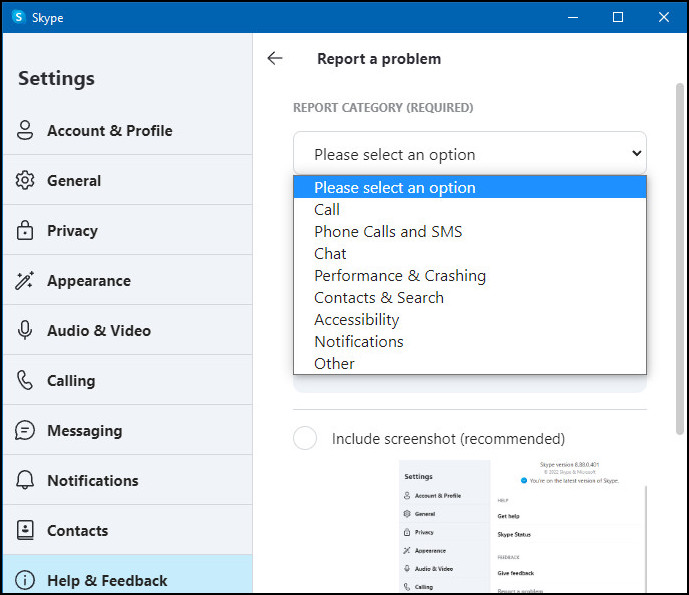
The support team will give you feedback as soon as possible. Please keep some patience.
There is also some issue regarding this topic. You can check them to get a deep understanding of this issue. Please take a look at the frequently asked question section.
FAQ
Question: How to Stop Skype from Running in the Background?
Answer: Follow these steps,
- Go to the Windows Settings.
- Choose the Privacy
- Find the Background Apps
- Disable your Skype
Question: Why Does Skype for Business Open Automatically?
Answer: Skype for Business launches immediately because the feature is enabled
In the application setting. However, it may also launch if Windows settings / the Task Manager have enabled the auto-start option.
Question: How Do I Get Rid of Skype for Business Pop-Up?
Answer: Follow these steps,
- Start your Skype for Business application.
- Navigate to the Settings option.
- Choose the Personal option.
- Disable the option mentioned as Automatically start the app when I log on to Windows
- Disable again another option mentioned as Start the app in the foreground.
Conclusion
The features of Skype include the ability to chat, make calls, and share files with your connections with a simple, open platform. But there are troubles with it.
The common issue is that Skype continues opening on its own, which I’ve solved in this post. I’ve shared all of the tried-and-true fixes for this issue and described why it happens so you can completely eliminate it.
Try each of the methods and set the perfect settings for your OS and application. Always remember to keep your PC free from viruses. Use an updated version of your Skype application.
Now let me know which technique responds faster for you.