Whether creating a beautiful collage for a birthday event or an eye-catching desktop slideshow, randomizing photos can come in handy in various scenarios.
Unfortunately, many beginners often struggle trying to generate a randomized slideshow or shuffle images in a folder. It can be disheartening when you’re trying to shuffle images for work or event purposes but can’t figure out how to do it properly.
Whatever the case, if you are having trouble understanding how to randomize your photos in a folder, you’ve come to the right place.
In this article, I have compiled all the best & precise methods to randomize photos & generate slideshows and discussed them in great detail.
So without further ado, let’s get started.
How to Randomize Photos in a Folder
The most hassle-free way to randomize photos in a folder is using the Sort by option in Windows File Explorer. You can also disarrange photos by turning off the auto arrange option via the registry editor or by using a third-party tool.
Additionally, you can install the git bash terminal & write a command code to randomize the photos in your targeted folder. But that process can be a bit tricky & any misstep might put your PC at risk.
Here are the methods to randomize photos in a folder:
1. Use Windows File Explorer
Although Windows File Explorer has no built-in option to shuffle your photos in a folder, you can tweak certain options to get the job done.
Here’s how to use Windows File Explorer to randomize photos in a folder:
- Press Windows Key+E and navigate to your desired folder.
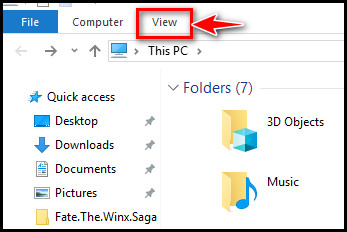
- Click on the View tab from the top dashboard.
- Select Sort by. You’ll see different organizing criteria.
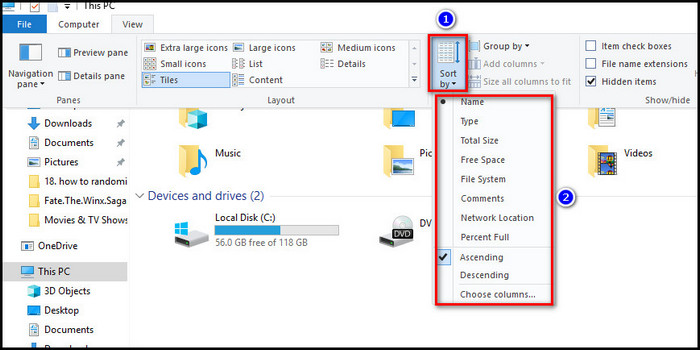
- Select some of the photos and sort them by ascending size.
- Select other photos and sort them by their names. You can use other sorting criteria as you like.
If you want to randomize a small number of photos, you can manually rename them with a random three-digit number. Then sort them by Name(Ascending or Descending) criteria; now, you’ll see them in a randomized order.
2. Disable Auto Arrange via Registry Editor
In the prior versions of Windows, users could disable auto arrange from the options, but the latest windows versions have removed the built-in option to do so. Users now have to use an alternate method to disable the auto arrange feature.
One way to disable the auto arrange feature in Windows 10 is via the registry editor.
Here are the steps to disable auto arrange using Registry Editor:
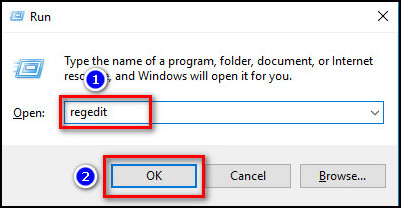
- Press the Windows Key+R & type regedit.
- Click OK.
- Select HKYE_Current_USER.
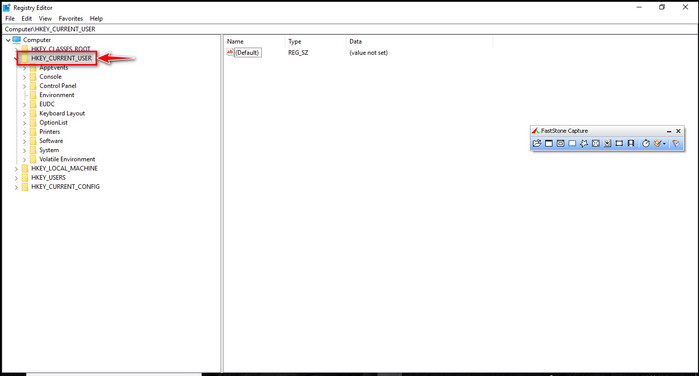
- Navigate to Software > Classes > Local Settings > Software > Microsoft > Windows > Shell.
- Expand the Shell menu.
- Right-click on the Bags sub-key and select Delete.
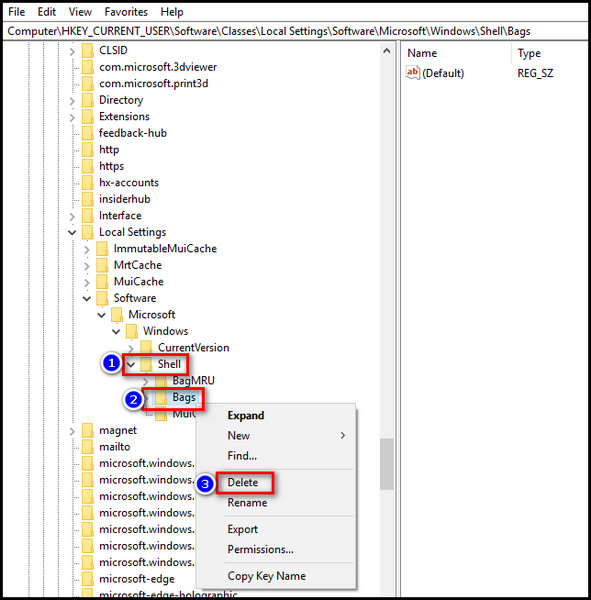
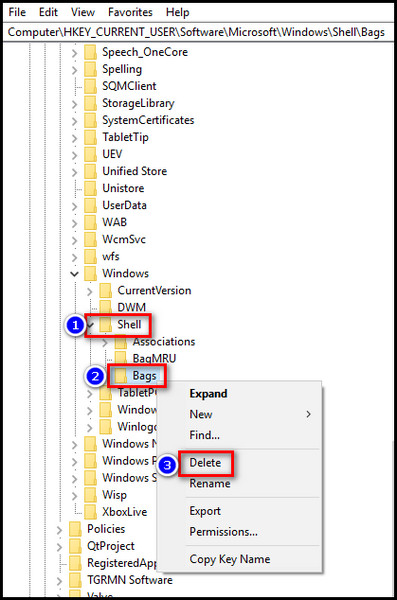
- Navigate to Software > Microsoft > Windows > Shell.
- Expand the Shell menu & right-click on the Bags sub-key.
- Hit Delete.
Now restart your PC & go to your targeted photo folder. Right-click on empty space in that folder & select View; you’ll now see the option to disable auto arrange.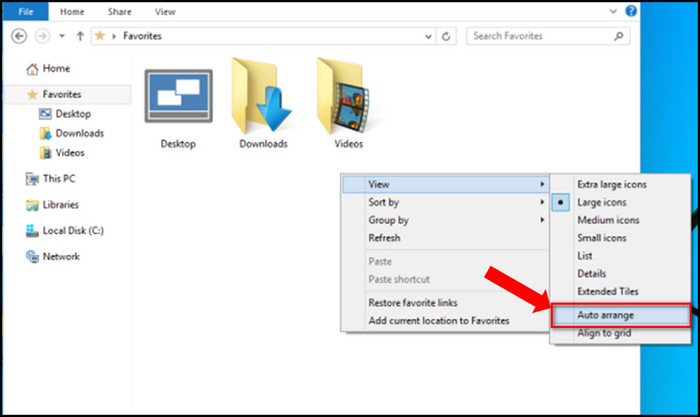
3. Use Bulk Rename Utility Tool
There’s a third-party utility named Bulk Rename Utility which is very useful in this kinda scenario. It is compatible with Windows 7,8,8.1,10 & 11.
Here are the necessary steps to randomize photos using the Bulk Rename Utility tool:
- Download and install Bulk Rename Utility on your computer.
- Run the utility tool.
- Click on the folder icon.
- Select your desired folder.
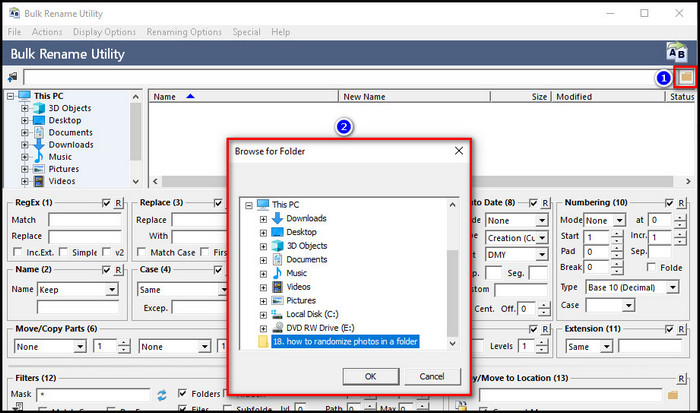
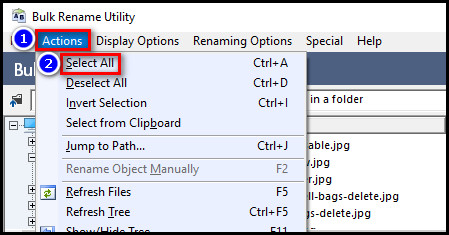
- Choose Actions > Select All.
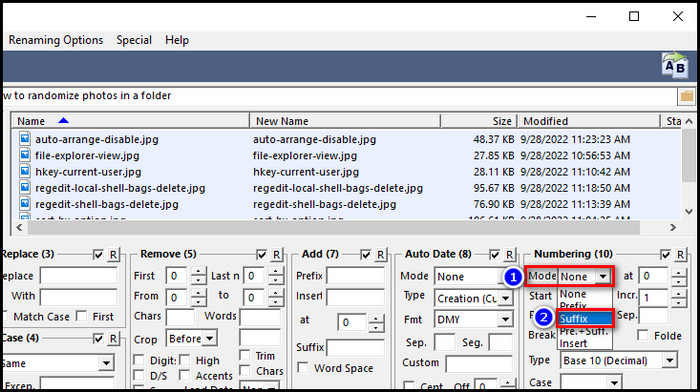
- Select the Mode option under the Numbering field.
- Click on Suffix from the drop-down menu.
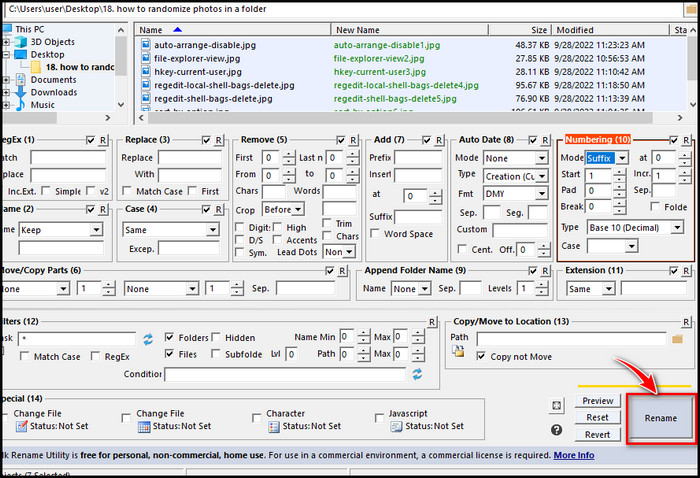
- Hit Rename.
- Select OK.
The selected photos will be renamed with random numbers. You can also select pre+suffix to further randomize the order of the images.
How to Create a Randomized Slideshow
A shuffled slideshow is great in many cases, such as birthday or wedding events. Fortunately, Windows has a built-in option to show randomized photos in a slideshow.
Here are the steps to create a randomized slideshow:
- Press Windows Key+R.
- Open the folder where your desired images are.
- Choose all or specific images that you want to display in the slideshow.
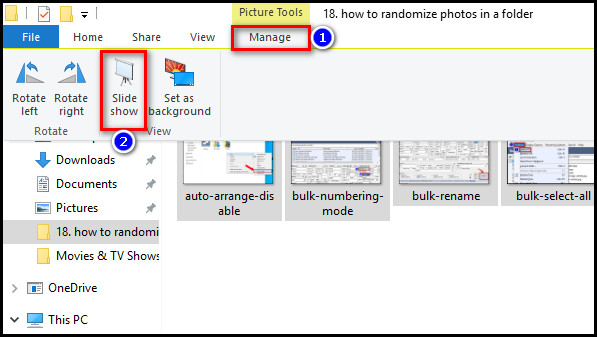
- Select Manage from the top menu bar.
- Click on Slide show.
- Right-click anywhere on the screen and select Shuffle.
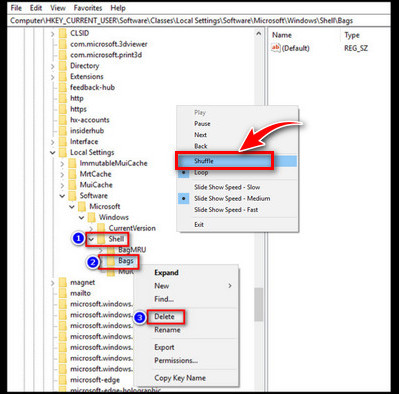
Now the slideshow will display the images randomly.
How to Generate a Desktop Wallpaper Slideshow Shuffle
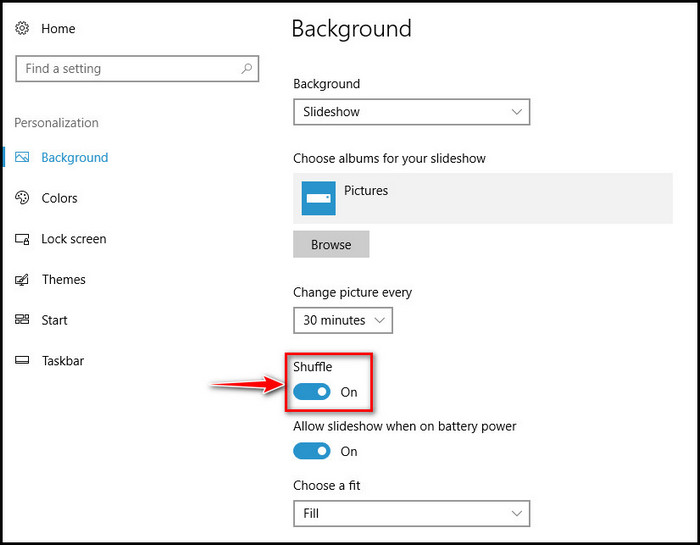
You can set your desired photos in a folder as your desktop PC’s wallpaper slideshow in random order. Both Windows & Mac PCs support showing photos as slideshow wallpaper in random order.
Here’s how to generate a desktop wallpaper slideshow shuffle:
For Windows
- Put all the photos that you want to show in the randomized wallpaper slideshow in a single folder.
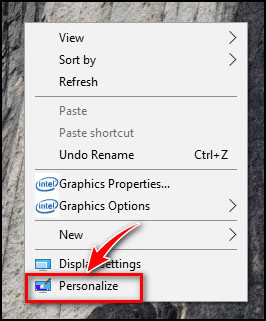
- Right-click on your desktop and select Personalize.
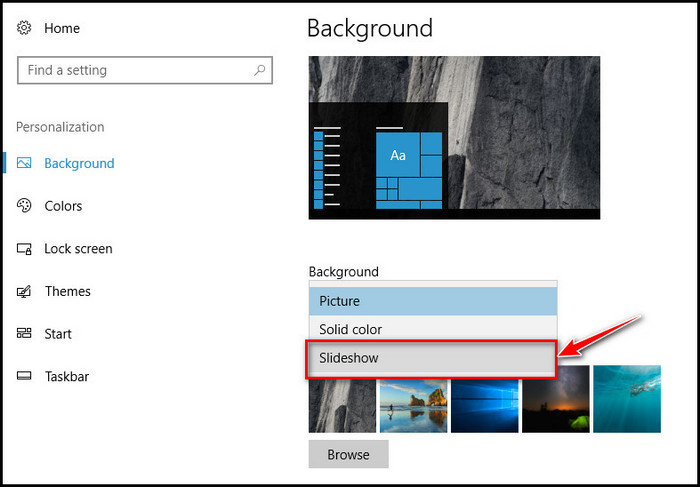
- Click on the drop-down menu under Background and choose Slideshow.
- Hit Browse.
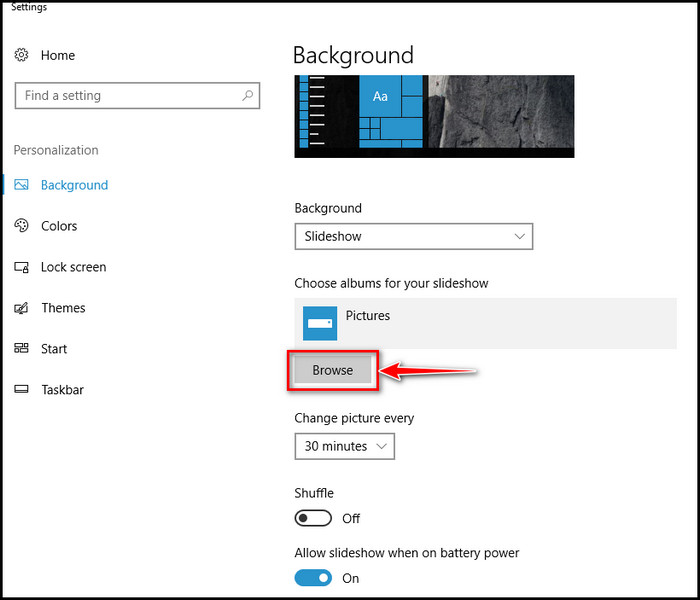
- Navigate to your targeted folder and click Choose this folder.
- Switch on the Shuffle toggle.
For Mac
- Click on the Apple icon at the top left corner of the screen.
- Select System Preference…
- Click on the Desktop & Screensaver option.
- Drag your desired folder with photos & drop it in the left column.
- Tick the box beside Change picture.
- Tick the box beside Random order.
Now your Mac will randomly display all the photos in your targeted folder in the wallpaper slideshow.
Frequently Asked Questions
How to hide multiple images in a folder?
You can hide multiple images in a folder by selecting those desired images & right-clicking on any of them. Then select Properties, tick the Hidden box & click Apply.
How to randomize files in a folder?
You can randomize files in a folder by using 3rd party utilities such as Bulk Rename Utility to randomize the file names or disable auto arrange via registry editor.
Final Words
Randomizing photos can often seem complicated but don’t get too desperate & end up downloading pre-customed bat files from random websites on the internet. You might think using those bat files are easier & quicker, but sometimes it can put your PC at risk.
I hope after going through this write-up, randomizing your desired photos in a folder won’t be an issue for you.
If you have any further queries about this topic, feel free to share your thoughts in the comment section below.