Microsoft has multiple storing applications to store and share files that offer different functionalities depending on the user’s accounts.
Shared libraries of OneDrive are more useful for a small team to share essential files and documents frequently with the team members.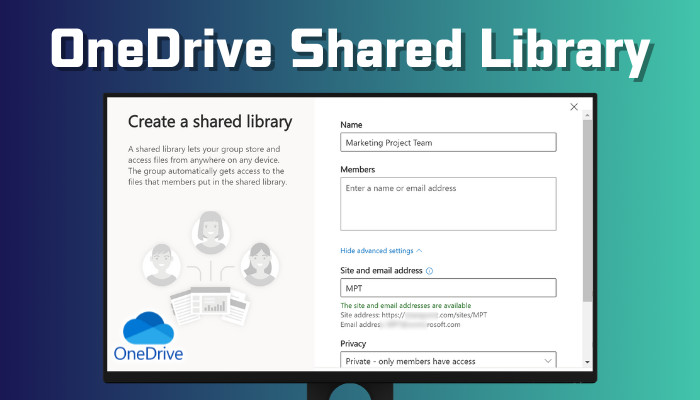
In this article, I will show you how to create and view your shared libraries in Microsoft OneDrive.
Let’s begin!
To create a shared library in Microsoft OneDrive, log in to OneDrive using your work or school account. Select Create shared library from the left pane, add a name, and add people to the shared library. Select Advanced settings and follow the on-screen instruction, and click Create.
If you don’t see the option to create a new shared library, contact your admin to turn on the feature for your account.
While choosing a name for the shared library, ensure the name is available. Otherwise, you won’t be able to create the new library. Go through the subsequent procedure to create a shared library in OneDrive.
Here are the steps to create a shared library in OneDrive:
- Open your browser and go to OneDrive.
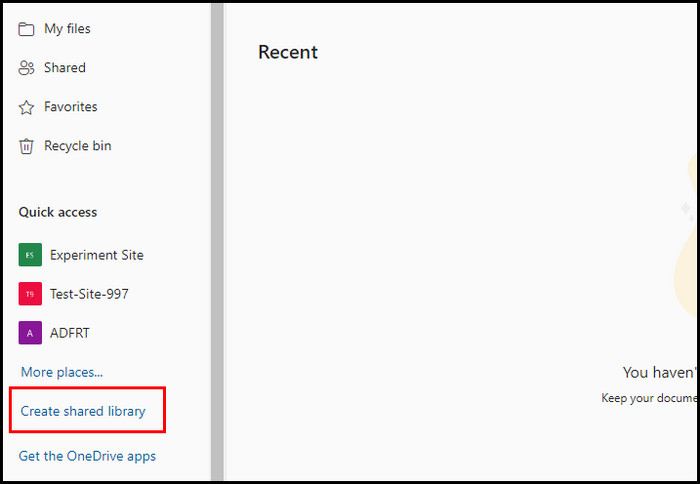
- Click Create shared library from the left pane.
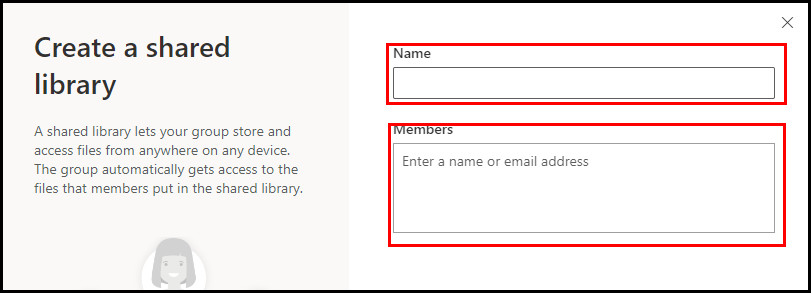
- Type a name for the new library.
- Enter the names or email addresses and select the name under Members to add people to the shared library.
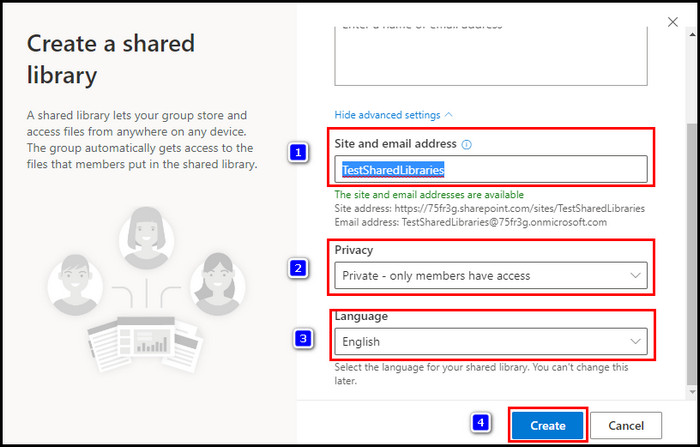
- Select Advanced settings to open more options.
- Locate the Site and email address field, which should be automatically created. However, you can change it according to your need.
- Choose Public or Private from the Privacy settings drop-down menu.
- Select a site classification under the Sensitivity section. You won’t see the Sensitivity section unless your admin turns it on.
- Choose a language from the Language drop-down menu.
- Select Create.
A newly created shared library will be listed under the OneDrive left pane. Otherwise, you will find them under the Followed section in More libraries. OneDrive can take up to 48 hours to show the shared library in your list of shared libraries.
If you want to delete your shared library, check out another post on how to delete a shared library in OneDrive.
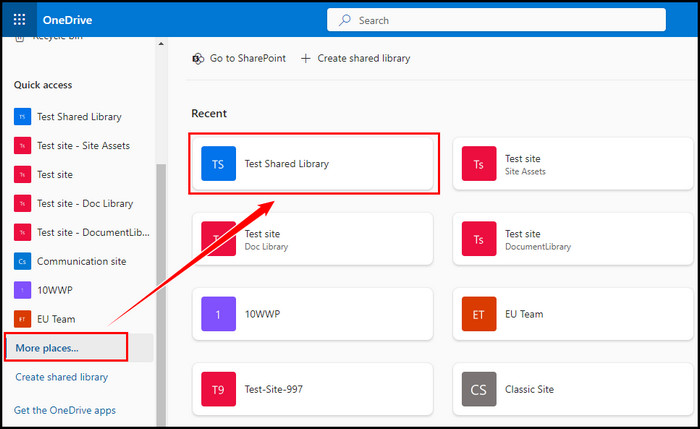
If you want to view your shared libraries in OneDrive, go to OneDrive, locate and click on Shared libraries from the left pane of the OneDrive homepage, and select your shared library. If the option is missing, click More libraries and open your shared library by clicking on it.
Consider the following step-by-step instructions to view your shared libraries in Microsoft OneDrive.
Check the following procedure to view OneDrive shared libraries:
- Sign in to OneDrive using your login credentials.
- Locate Shared libraries in the left pane and click on your shared library to view it.
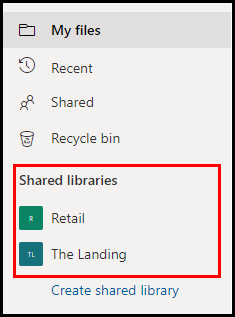
- Click on More libraries or More places if you don’t see the library listed under Shared libraries.
You can also use your OneDrive mobile application to view the shared libraries. Switch to the Libraries tab, select the site name, and choose the library to view your shared libraries.
Note: Some users claimed they could not see the shared SharePoint folder in OneDrive. If you also face the same issue, go to OneDrive and navigate to Shared > Shared with you. Use OneDrive on the web version to view the shared files or folders.
OneDrive shared network drive and OneDrive shared libraries offer different features for the users. To understand which one suits your need, check out another post on OneDrive Shared Network Drive Vs. Shared Libraries.
Several reasons can restrict OneDrive from showing shared libraries, such as permission settings, sync errors, OneDrive version, network errors, or time limitations to show the shared libraries. Consider the following discussion to understand why your shared libraries are not showing.
Here are the reasons that restrict OneDrive from showing your shared libraries:
1. Mis-configured Permission Settings
Ensure you have appropriate permission to access the shared folder. Without enough permission, you won’t be able to access the OneDrive shared libraries.
Contact the library owner to assure you have enough permission to access the shared libraries of OneDrive.
2. Sync Errors
When OneDrive cannot sync the shared libraries, they won’t appear on your OneDrive account. Open your OneDrive client and ensure the sync status is active. Otherwise, OneDrive will fail to sync the files and folders.
3. Outdated OneDrive Version
Compatibility is another issue that can prevent showing OneDrive shared libraries. So, ensure you are using the latest version of OneDrive to view your shared libraries.
4. Network Errors
A bad or unstable internet connection cannot sync the shared libraries. Check your internet connection and ensure your files are syncing properly.
5. Time Limitation
Microsoft usually takes up to 48 hours to show the shared libraries in your OneDrive account. It is suggested to wait several hours after creating a shared library in OneDrive. Within this time, your shared libraries will appear on your account.
Frequently Asked Questions
What is a shared library in OneDrive?
OneDrive’s shared library allows you and your team to store and access all types of files where you can work together with your team. You need a OneDrive for work or school account to connect with the shared libraries.
What is the limit of a shared library in OneDrive?
There is no direct limit for OneDrive shared libraries. However, Microsoft suggests that users should use a maximum of 300,000 files for a OneDrive library.
Is OneDrive shared library the same as SharePoint?
OneDrive’s shared library is more suitable for storing simple personal documents than team projects. Contrarily, SharePoint shared library is appropriate for storing team projects because of its collaborative features.
Wrap Up
With your work or school account and permission from your admin, you can quickly create a shared library in OneDrive. However, the option may vary depending on your account.
You can also delete existing shared libraries or view them from the Shared libraries section of the OneDrive homepage.
Did you need further assistance regarding OneDrive’s shared library features and functionality? Let me know in the comment section.