While using SharePoint for an extended period, it’s obvious that your document library will be a mess with numerous items.
So, is there any way to control your documents and keeps your site clean? Fortunately, SharePoint has various options to archive the documents.
Let’s dive into this article to archive your SharePoint documents in different ways.
Yes, SharePoint allows users to archive all types of documents, including list items, libraries, and document lists. However, the archiving procedures only work on SharePoint Online. Other SharePoint versions don’t include the functionality of archiving your SharePoint documents.
Though there are no direct ways to archive documents, instead you have to use some workarounds to achieve this.
For instance, you can sync your SharePoint documents with OneDrive to create a backup or archived copy of the files.
Contrarily, you can manually move the documents to another folder to archive them. Besides, you can effortlessly archive all your documents using the Power Automate application, hiding documents from users or using a retention policy.
There are several ways to archive SharePoint documents. You can archive your documents using OneDrive, Version Control, Retention Policies, Power Automate, hiding documents, or moving files to an archive folder. Creating a new status column, you can do the same.
Note: All the following methods only apply to SharePoint Online. For other SharePoint versions, use the content organizer method.
Go through the following methods to archive your SharePoint Online documents.
Here are the methods of archiving documents in SharePoint Online:
1. Archive Documents Using OneDrive
When you remove a file from a SharePoint document library, the file also gets removed from the OneDrive application on your computer. Archiving files on your computer can resolve this issue.
If you don’t have OneDrive latest version installed on your PC, install the most recent version and check the subsequent process to archive SharePoint documents.
Here’s how to archive documents using OneDrive apps:
- Go to SharePoint Online and open a site.
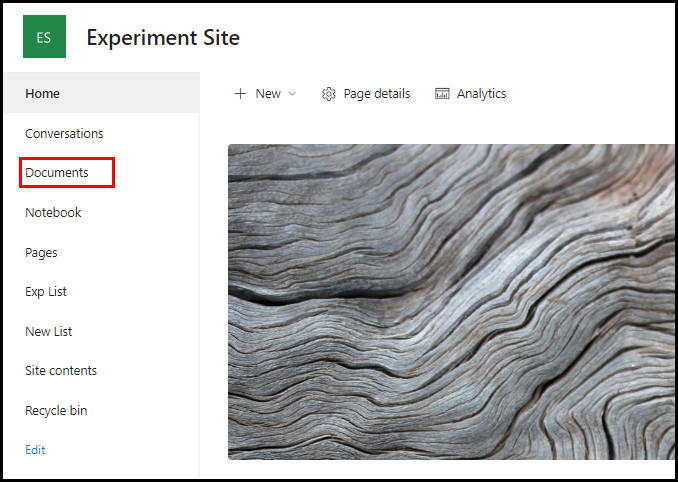
- Click on Documents to open the document’s library.
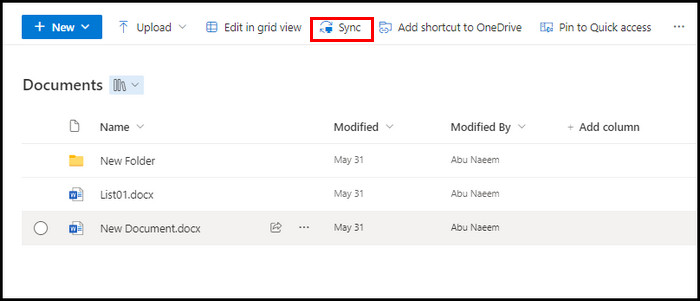
- Select Sync from the top bar.
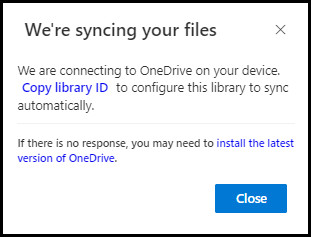
- Check the Always allow to open links… checkbox and select Open Microsoft OneDrive.
- Wait until the synchronization to your PC is completed. Usually, OneDrive only saves the opened files. To archive all files, you must disable Files On-Demand.
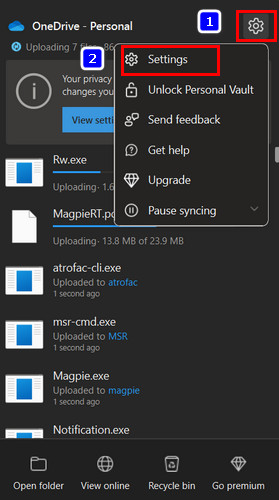
- Open the OneDrive desktop app.
- Navigate to Help & Settings > Settings > Advanced settings.
- Locate Files On-Demand and select Download all files > Continue to complete the archiving process.
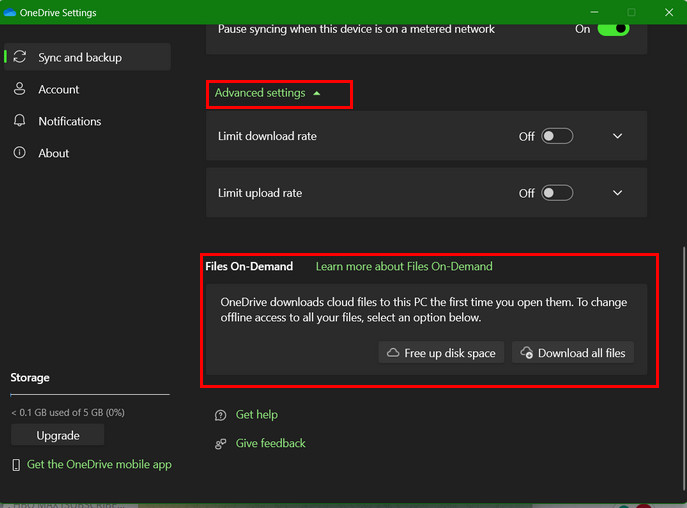
The above procedure will sync all files to your PC and create a saved copy of all documents. You can access the documents even after removing the files from SharePoint.
2. Auto Archive Using Version Control
Version control is a unique feature of SharePoint that assists in creating multiple versions of the source document. It allows users to restore any previous document version, even after deleting it from SharePoint.
To enable and use the version control feature for your SharePoint documents, go through the following instructions.
Check the steps below to archive documents using version control:
- Go to your SharePoint site and click Documents from the left pane.
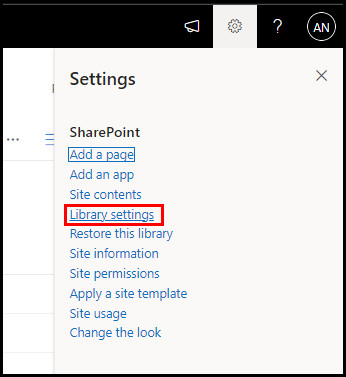
- Click the Gear icon (Settings), and choose Library settings.
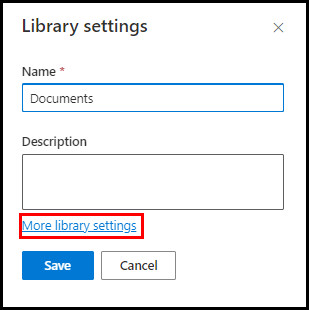
- Select More library settings.
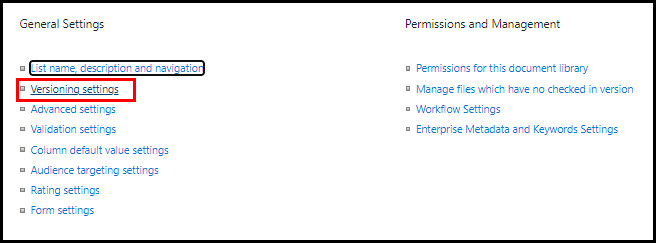
- Click Versioning settings under the General settings.
- Select any of the following options:
- Create major versions.
- Create major and minor (draft) versions.
- Click OK to save the changes. Now, you can restore a previous version of any document by following the steps below.
- Go to your Documents library.
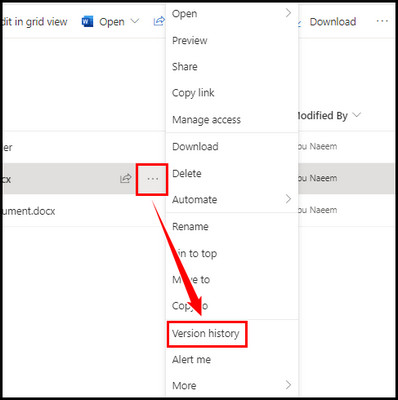
- Right-click on the document or three dots next to the document name, and select Version history from the context menu.
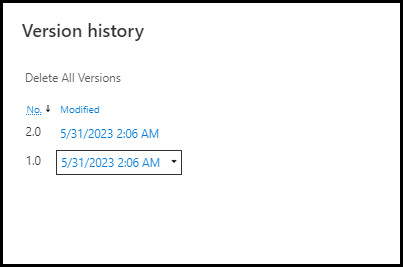
- Hover your mouse over the versions, and click the down arrow button.
- Select Restore from the popup menu to restore the version.
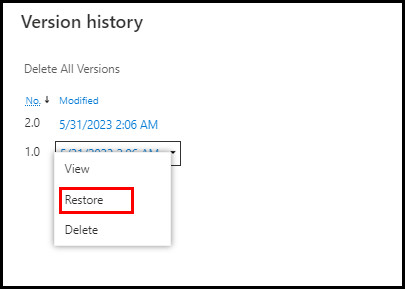
Version history also allows you to delete unnecessary versions. Besides, the View option in the popup menu can be used to see the document preview.
3. Archive Using Retention Policy
Create a completely automated system to archive SharePoint documents. Use the Compliance application to create a new retention policy that will automatically delete the selected files after a particular time.
Here’s how to create a new retention policy in the Compliance app:
- Go to SharePoint and click the App launcher.
- Find the Compliance app and click to open it.
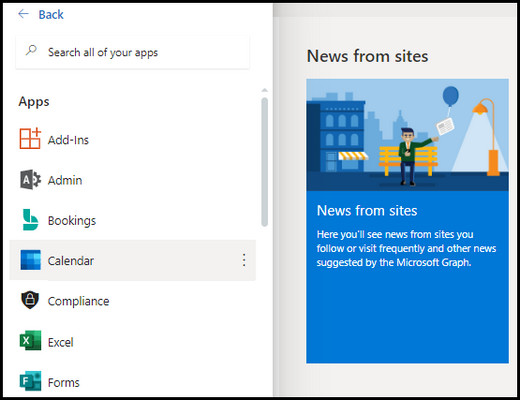
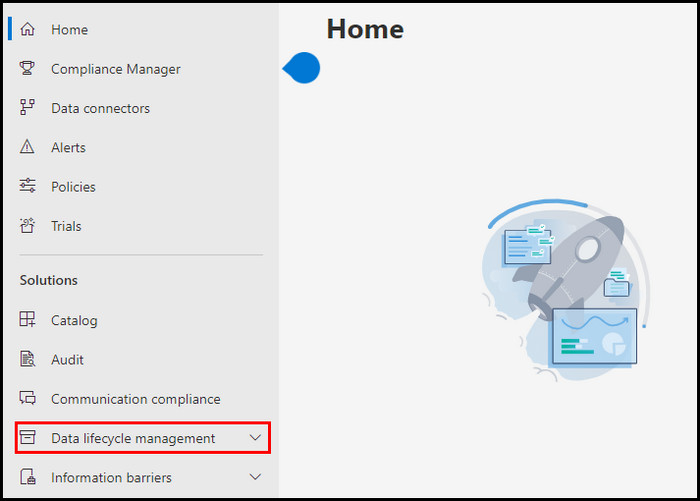
- Locate Data lifecycle management under Solutions, and click on it.
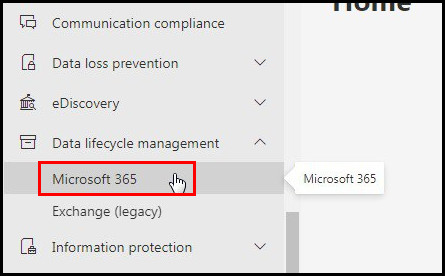
- Select Microsoft 365 from the dropdown menu.
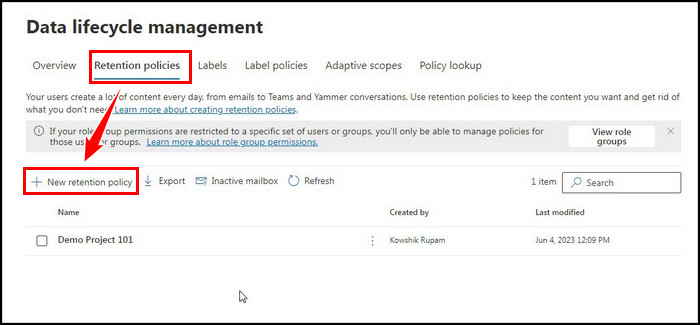
- Switch to the Retention Policies tab.
- Click + New retention policy.
- Configure the policy according to your need.
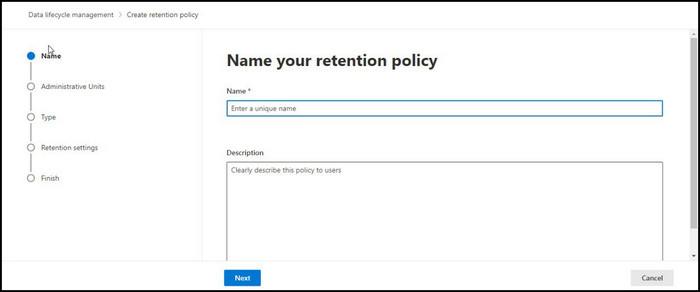
You can configure the policy as you want. For instance, if you want to retain items for a specific period or forever, select the relevant options.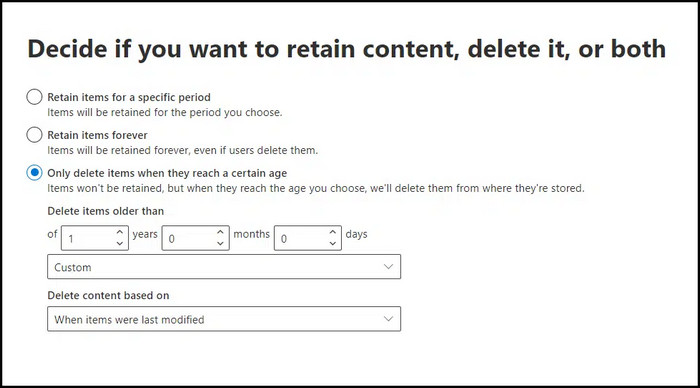
Once the policy is applied to your files, the files will be removed or deleted after the period you choose while creating the policy.
4. Use Power Automate Workflows
By creating a workflow in Power Automate, you can truly archive SharePoint documents. What you need to do is to create a flow that will automatically archive files from one document library to another.
You can quickly create a flow If you are comfortable with Microsoft Flow. Otherwise, you may find the process a little bit complicated.
Here are the steps to create a flow to archive SharePoint documents:
- Go to Power Automate and create a new flow.
- Create a new recurrence trigger. It will configure the frequency and interval of the flow.
- Add Get past time and configure it for time and interval units.
- Use the source document library to set up the retrieval of the files.
- Set up the retrieval of file metadata for every file.
- Configure copy path. Add source and destination.
- Set up the deletion process.
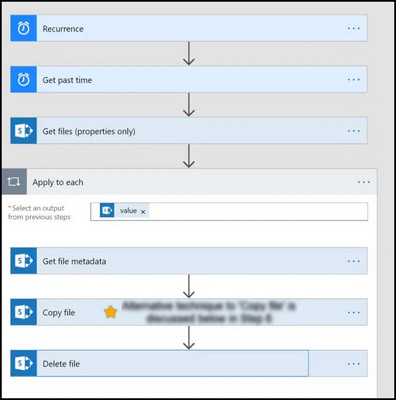
When you successfully configure the flow, it will automatically archive your SharePoint documents to the destination folder.
5. Archive by Hiding Documents
Though this is not a direct archiving method, it can be a quick workaround to store the files or documents from others in an archive folder.
Hiding the documents doesn’t remove the access of site owners and administrators. Instead, it hides the documents from site members and visitors.
Check the following instructions to hide documents:
- Go to your SharePoint document library.
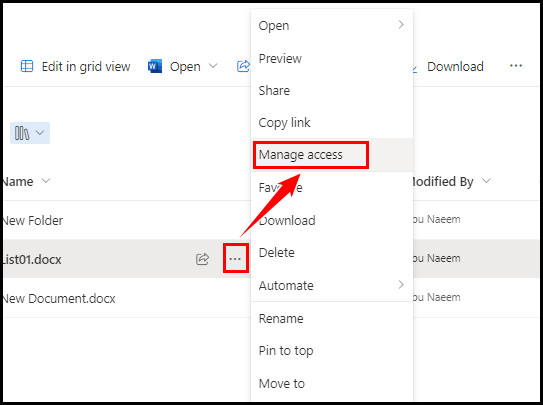
- Right-click on the document, or click the three dots next to the document name.
- Select Manage access from the context menu.
- Click Stop sharing under the Manage access tab.
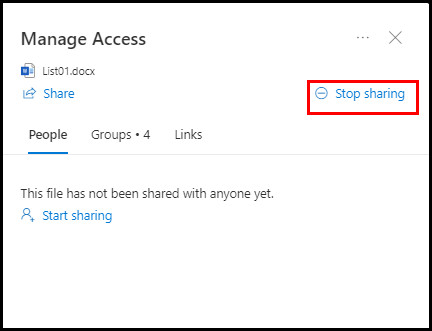
- Confirm Stop sharing by clicking the Stop sharing button.
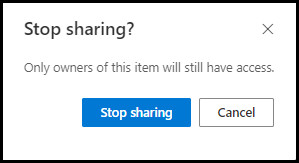
Here you can create another folder and rename it “Archived” to store hidden files. In addition, moving the hidden files to another folder can boost your site’s performance.
6. Archive Files by Moving Data to Another Library
Moving or deleting the documents is the most convenient and easy-to-follow method. It doesn’t need any automation. However, the downside of the procedure is it needs manual intervention.
Take a look at the following steps to move data to another library:
- Go to your SharePoint site and open the Documents library.
- Right-click on the document you want to move.
- Select Move to from the context menu.
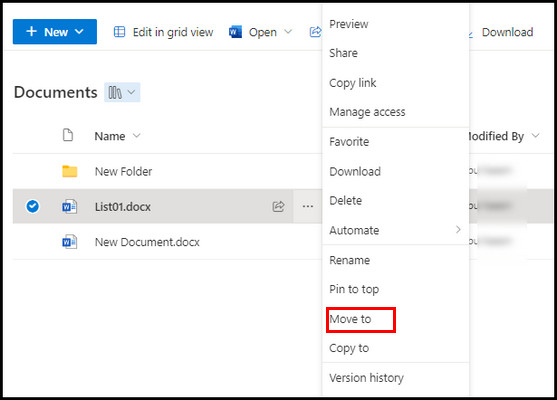
- Create a New Folder and open it.
- Select Move here to transfer the files to the New Folder.
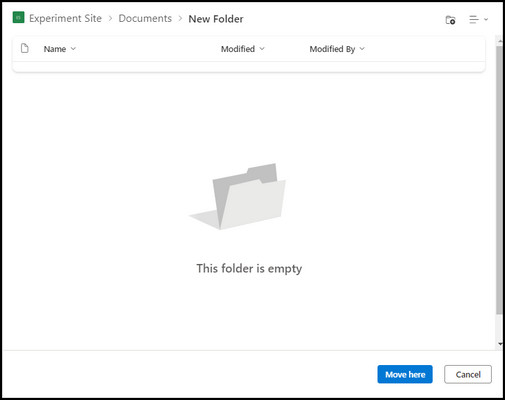
You can also delete the file to remove it from other users. To do so, right-click on the document and select Delete from the context menu.
Frequently Asked Questions
How do I archive an entire SharePoint site?
To archive the entire SharePoint site, go to your modern SharePoint libraries, select all the files, and click the Download button to download the selected files. Repeat the process for each document library to archive the entire site.
How to archive large list items to another list in SharePoint?
When you need to archive large list items to another list in SharePoint Online, create a new list where you will archive the items, transfer or move the list items to the new list.
Can you hide documents on SharePoint?
Yes, you can hide documents on SharePoint using the Manage access feature. Though, it will not archive the documents. Instead, it will hide the documents from site members and visitors.
Concluding Words
Archiving SharePoint documents are necessary to ensure a clean and faster experience while navigating through your sites.
Remember, you don’t have to archive the documents on a daily basis. Instead, you should create an automated way to archive the files.
I hope this article assists you in archiving your SharePoint documents. For further queries, leave a comment below.


